![Icon for Courses-1.png]](https://help.oneclickcontractor.com/hs-fs/hubfs/Icon%20for%20Courses-1.png?width=36&height=36&name=Icon%20for%20Courses-1.png)
Requirements
-
Permission to edit the applicable Product Price List.
Note: Attaching a document to a product ensures that it appears only when that specific product, or an applicable child in its product tree, is added to an estimate. This helps prevent the document from being populated elsewhere and makes it less likely that a required document is forgotten when the product is used.
Attach a product document
Step 1: Open the product and select Documents. Hover over the product, select its pencil icon, then open the Documents tab.
Upload the document. Select the Upload button and choose the file you want to attach to the product.
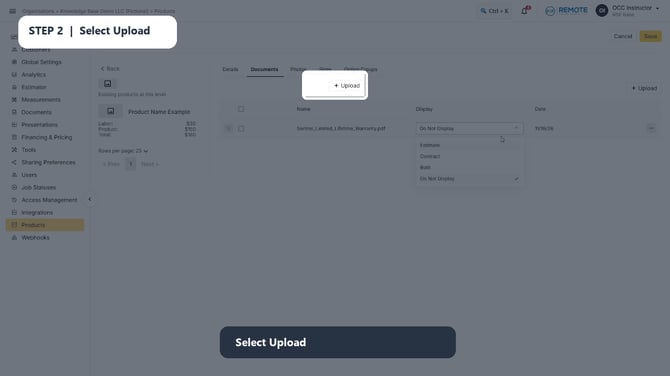
Image description: The Upload button on the Documents tab highlighted.
Step 2: Confirm that the document is attached. Return to the product list and look for the green document indicator beside the product name. This confirms that the product has an attached document.
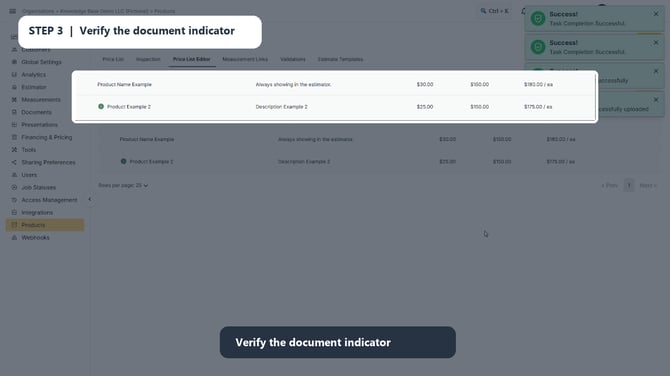
Image description: A product row with the green document indicator visible beside the product name.
Step 4: Choose where the document displays and save. Open the Display menu and choose Estimate, Contract (agreement), Both, or Do Not Display. Select Save after choosing the correct destination.
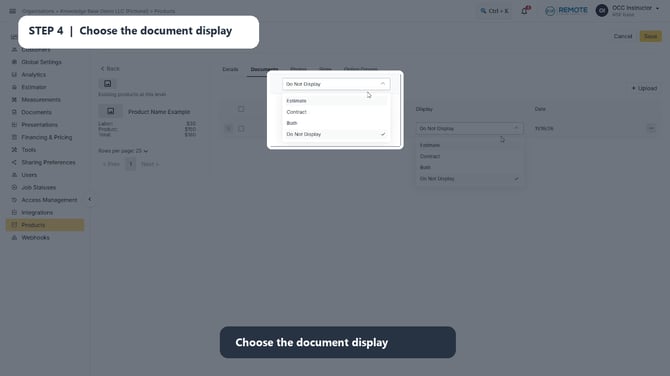
Image description: The Display menu expanded, including the Contract option for an agreement-only document.
Step 5: Activate the price list. Select Activate in Price List Editor so the current document attachment and display setting are available in the estimator.
💡Best practice
Before uploading a newer version, remove the previous document and confirm the Display setting for the replacement. This prevents an outdated document from remaining associated with the product.
Remember
What you see can differ depending on your organization’s settings and permission level. If you cannot see or do something described here, ask your manager first.