![Icon for Courses-1.png]](https://help.oneclickcontractor.com/hs-fs/hubfs/Icon%20for%20Courses-1.png?width=36&height=36&name=Icon%20for%20Courses-1.png)
Requirements
-
Sign in to OCC with an administrator account for the organization you are connecting.
-
Have the username and password for the CompanyCam account you want to authorize.
-
Decide which system should create OCC jobs. If a CRM already creates those jobs, do not also enable CompanyCam to create the same jobs in OCC.
-
Use matching email addresses in OCC and CompanyCam for automatic user linking. Plan to manually map users when their email addresses differ.
Authorize and configure CompanyCam
Step 1: Open CompanyCam in the organization integrations. In OCC, open the organization, select Integrations, and open the CompanyCam integration card.
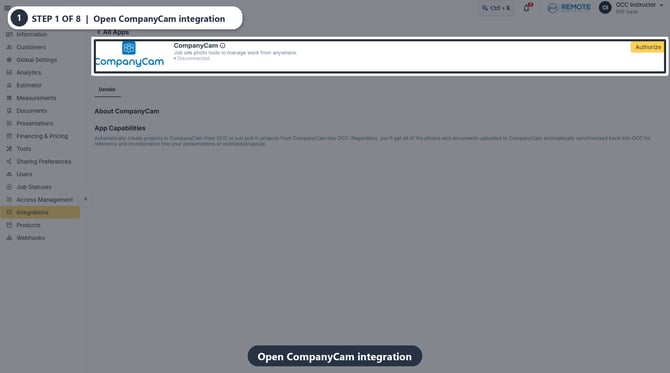
CompanyCam integration card in OCC before authorization. The screenshot shows the disconnected state and Authorize control.
Step 2: Select Authorize. On the CompanyCam card, select Authorize to start the connection.
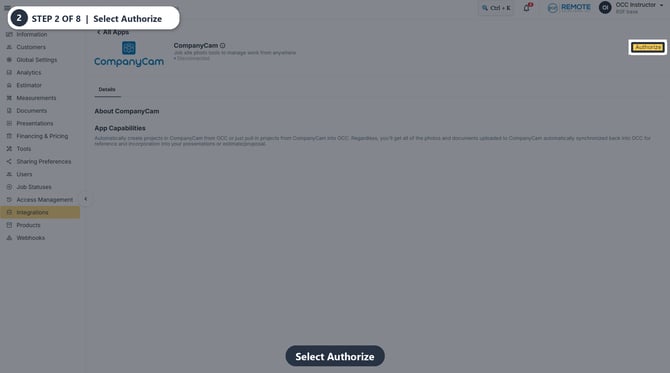
Disconnected CompanyCam card with the Authorize button highlighted.
Step 3: Confirm the authorization redirect. In the OCC confirmation dialog, select OK to continue to CompanyCam.
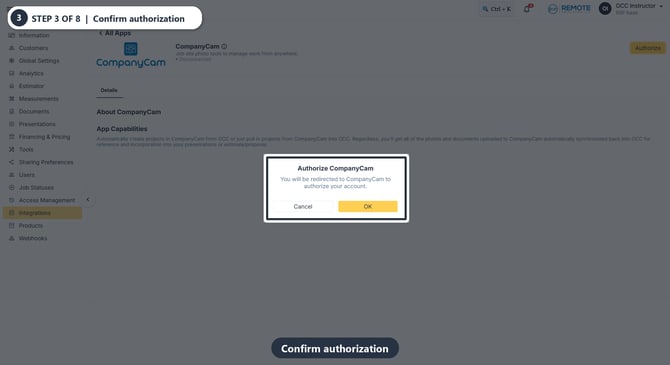
OCC authorization dialog with the OK button available to continue.
Step 4: Complete the authorization steps required by CompanyCam. Sign in to the CompanyCam account you want to connect and approve OCC access. Follow any additional prompts shown by CompanyCam; its authorization screens can vary by account.
Step 5: Return to OCC and run the initial synchronization. After CompanyCam redirects you to OCC, confirm the card shows Connected and select Sync. The initial Sync retrieves users and projects updated within the prior 29 days. OCC creates jobs from projects only when the corresponding setting is enabled and the assigned CompanyCam user is actively mapped to an OCC user.
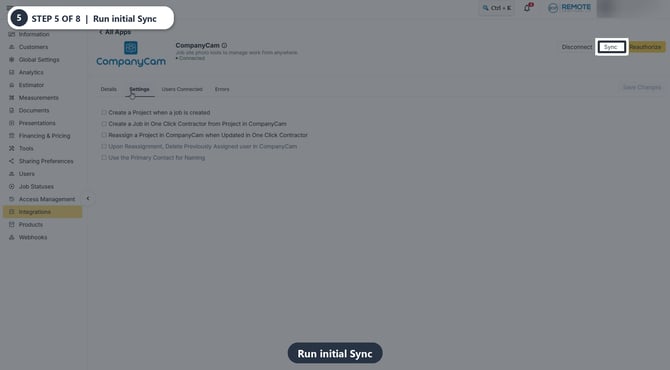
Connected CompanyCam card with the Sync control. The capture shows the current integration card and Settings tab.
Step 6: Choose the CompanyCam project and assignment options. Open Settings, select the behaviors your organization needs, and select Save Changes. The current screen capture shows the available options in an unchecked state and Save Changes disabled; it documents where the controls are, not a saved configuration.
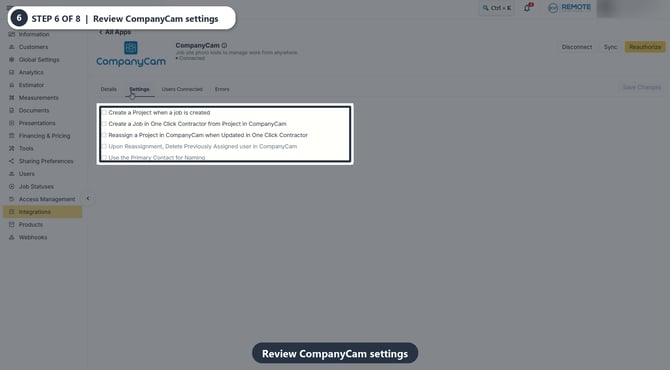
CompanyCam Settings panel showing all five preferences unchecked and Save Changes disabled in the captured state.
Understand each setting
-
Create a Project when a job is created: creates a corresponding CompanyCam project when a job is created in OCC. The project name uses the OCC job name; its address and assigned user are also sent.
-
Create a Job in One Click Contractor from Project in CompanyCam: allows an eligible CompanyCam project to create a job in OCC. The assigned CompanyCam user must have an active OCC user mapping. If a CRM already creates the same OCC jobs, leave this option off to avoid duplicate job sources.
-
Reassign a Project in CompanyCam when Updated in One Click Contractor: updates the CompanyCam project assignment when the OCC job is reassigned.
-
Upon Reassignment, Delete Previously Assigned user in CompanyCam: is available only when project reassignment is enabled. CompanyCam otherwise adds the new assigned user; enabling this option also removes the previously assigned user.
-
Use the Primary Contact for Naming: uses the project primary contact for naming when a CompanyCam project has multiple contacts. This also affects the mapped OCC job name and whether primary-contact email and phone are available in the inbound mapping.
Step 7: Review automatically matched CompanyCam users. Open Users Connected. OCC matches users by email address during synchronization. Review the CompanyCam User, One Click Contractor User, and Status columns; only actively mapped users can be used for project assignment and job creation.
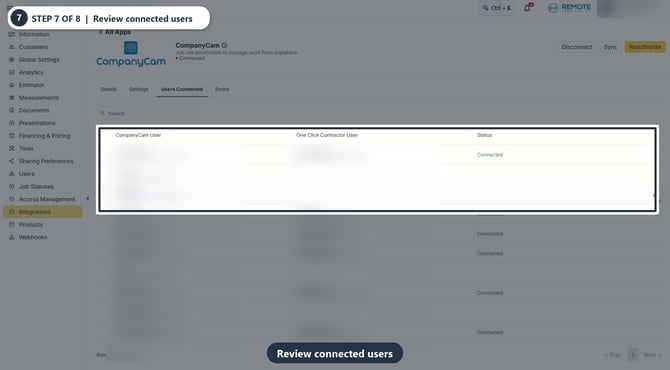
Current Users Connected tab showing user matching and status columns. Names and email addresses are blurred for privacy.
Step 8: Manually link an unmatched user. On the unmatched CompanyCam user row, select the pencil icon. In the CompanyCam User Match dialog, select the matching One Click Contractor User, keep Active selected, and select Save.
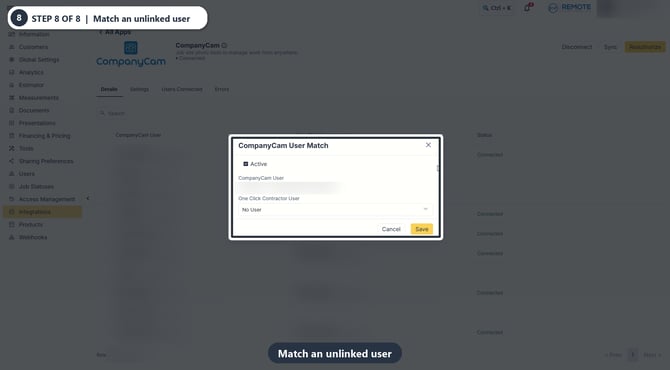
CompanyCam User Match dialog with the Active option, OCC user selector, and Save button; user identifiers are blurred.
Remember
What you see can differ depending on your organization's settings and your permission level. Tab names, headers, and available options are configurable. If you cannot see or do something described here, ask your manager first. They can contact support.
Only one integration should create OCC jobs for the same workflow. If your CRM is the source for OCC job creation, keep CompanyCam project-to-job creation disabled.