![Icon for Courses-1.png]](https://help.oneclickcontractor.com/hs-fs/hubfs/Icon%20for%20Courses-1.png?width=36&height=36&name=Icon%20for%20Courses-1.png)
Requirements
-
An approved FeneVision WEB manufacturer endpoint and logo.
-
Permission to manage organization integrations.
-
The manufacturer has completed the required FeneVision WEB and OCC onboarding.
Authorize and enable FeneVision WEB
Select Authorize. From the FeneVision WEB integration page, select Authorize in the upper-right corner.
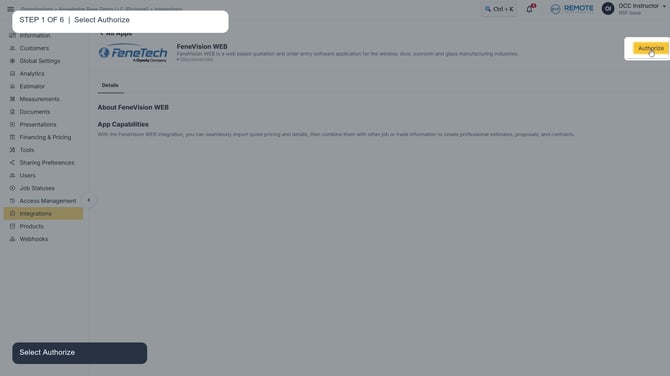
Select Authorize on the FeneVision WEB integration page.
Confirm authorization. Select OK in the confirmation window. After the success message appears, open the Settings tab.
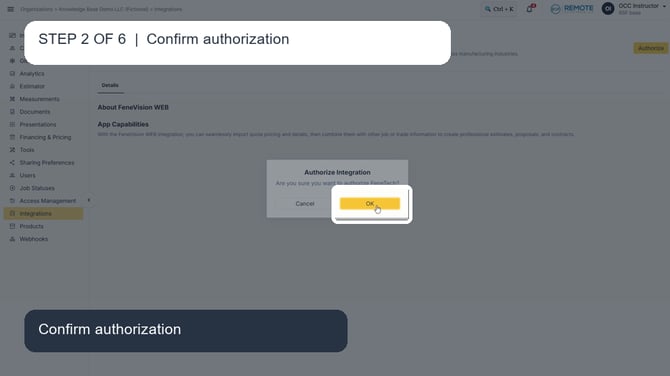
Select OK to authorize FeneVision WEB.
Open Settings and select Add. In Settings, select Add in the Manufacturers section.
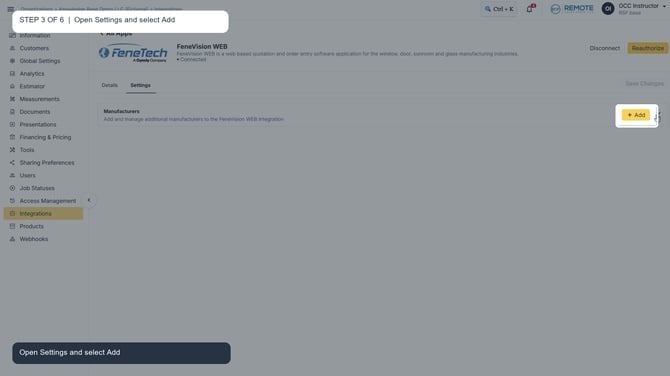
In Settings, select Add under Manufacturers.
Add and save Vytex. Enter Vytex and the approved endpoint, then select Save. The current Vytex endpoint is https://orders.vytexwindows.com/WEB.
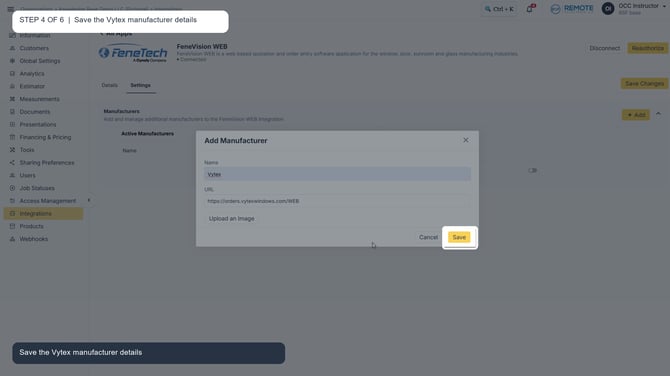
Enter the approved Vytex details and select Save.
Locate Vytex. After saving, find Vytex under Available Manufacturers. Its toggle is initially off.
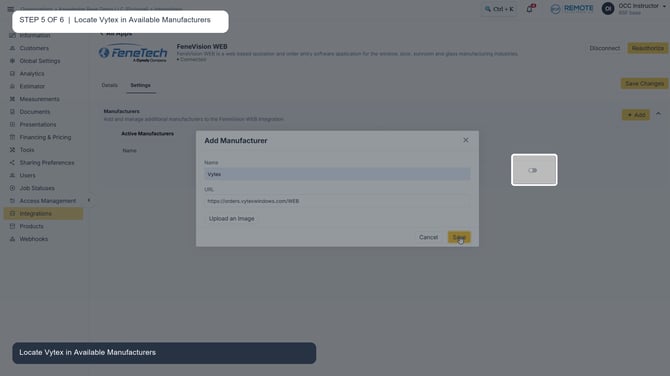
Vytex appears under Available Manufacturers with the toggle off.
Enable Vytex. Turn on the Vytex toggle. Verify that it moves to Active Manufacturers with the toggle on, then select Save Changes if prompted.
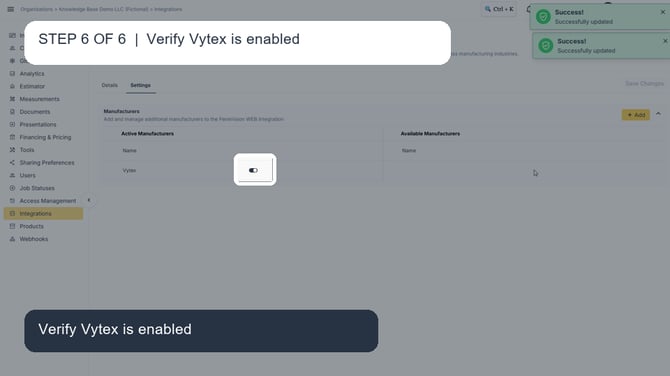
Vytex is in Active Manufacturers and the toggle is on.
Approved manufacturer endpoints
Use the approved endpoint exactly as listed. Do not substitute a guessed or customer-specific URL.
|
Manufacturer |
FeneVision WEB endpoint |
|
HomeGuard |
https://hgiwebcenter.com/WEB |
|
Vytex |
https://orders.vytexwindows.com/WEB |
|
NT Window |
https://myntlink.com/WEB |
Remember
What you see can differ depending on your organization's settings and your permission level. Tab names, headers, and available options are configurable. If you cannot see or do something described here, ask your manager first. They can contact support.