When using the Window-inator tool inside the Measurements tab in OCC there are a few steps
you will want to follow to enter the measurements and use them to generate an Estimate.
Enter Window Measurements
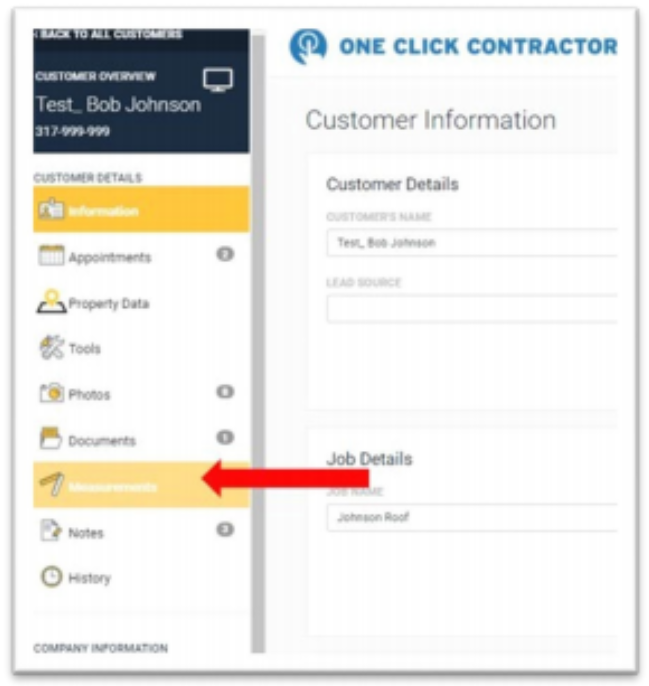
1. In a customer's job click on the Measurements tab on the left-hand tool bar.
2. Click on the "+Window-inator" button in the upper right-hand corner. If you don’t see the "+Window-inator" button, contact Customer Support at 877-320-2391 for assistance.

3. Click on "+Add New Elevation" in the upper right-hand corner.

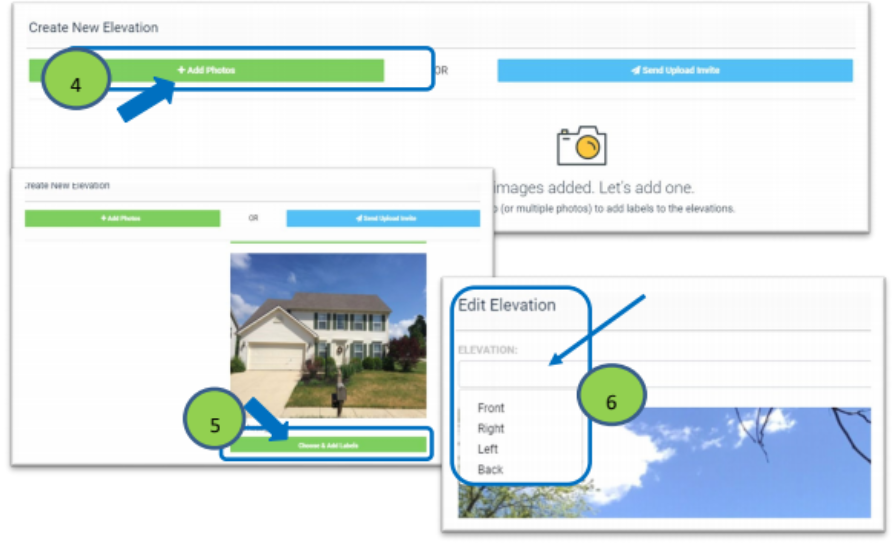
4. Choose "+Add Photos"
5. After photos have been uploaded, click “Choose and Add Labels”. These photos can come from those already uploaded on the Photos tab or click "Send Upload Invite" from the Photos tab for new photos.
6. Name your Elevation (Front, Back, Side, etc.) based on the photo uploaded.
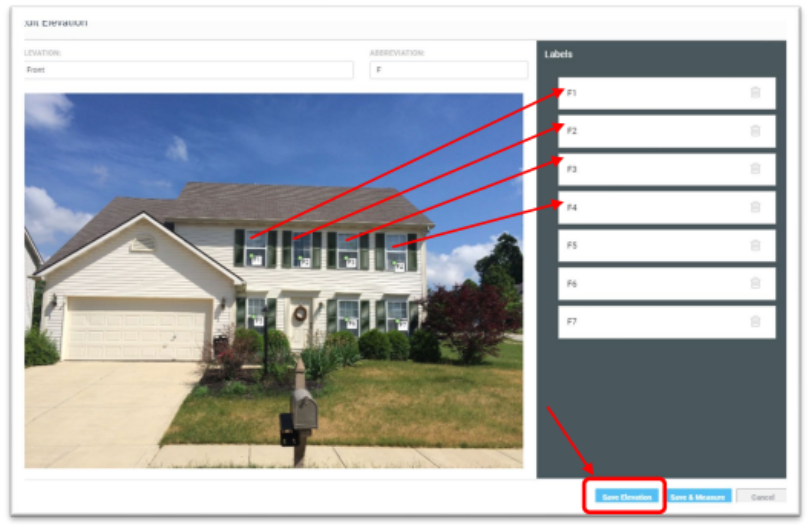
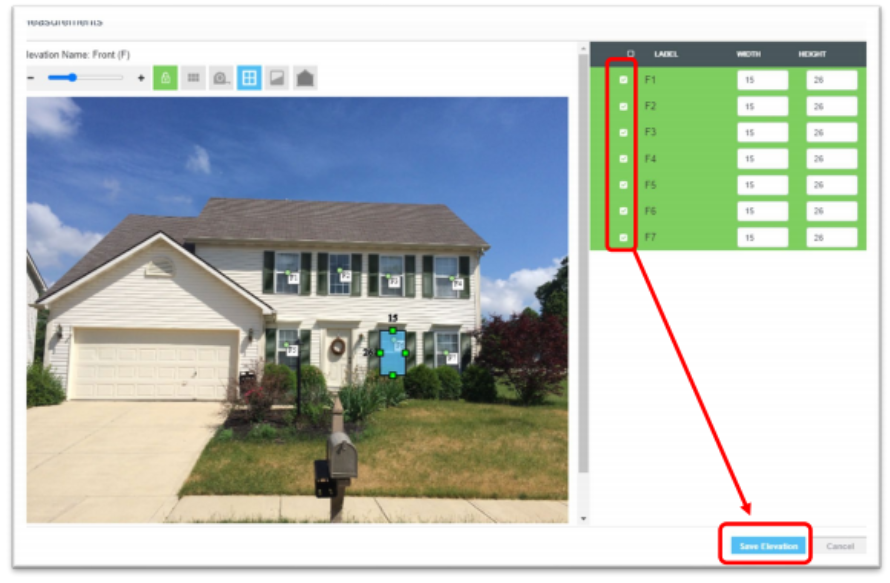
7. To identify the windows included in this Estimate, begin clicking on each window as shown in the photo. This will begin labeling the windows (F1, F2, F3, F4, etc.) and adding them on the right-hand side of the screen (as shown with the red arrows below). Once all windows are selected, there are two options: (1) Click the “Save Elevation” button at the bottom of the screen; or (2) click "Save & Measure" to follow the instructions below to have the system assist in measuring the windows.
8. For the Window-inator tool to provide approximate measurements for the windows, you need to generate an approximate scale of the house. To do so, click on the “Crop Icon” in the upper left hand of the screen and a scale will appear on your photo (shown below) to use the measuring tool.
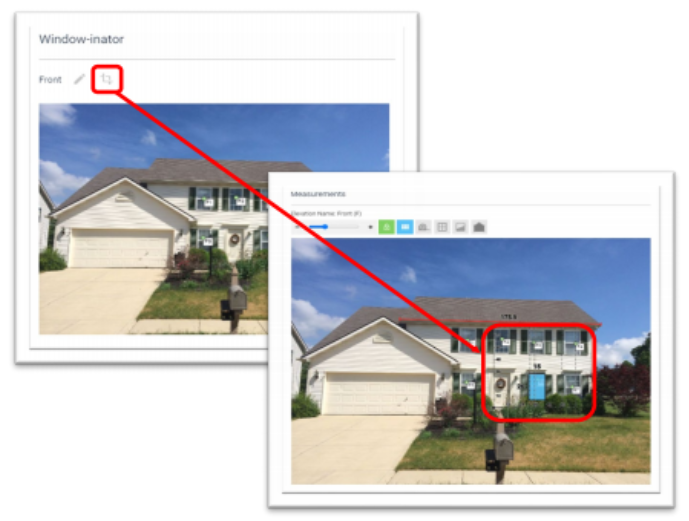
9. After clicking on the Crop icon (above), click and drag the measurement square so the bottom left corner aligns with the bottom left corner of the front door. Click the lock icon in the left side of the tool bar to save the position of the measurement on the front door. Please Note: The circles that appear on the scale must line up with the door as shown in the photo. Having a good picture makes this process more accurate.
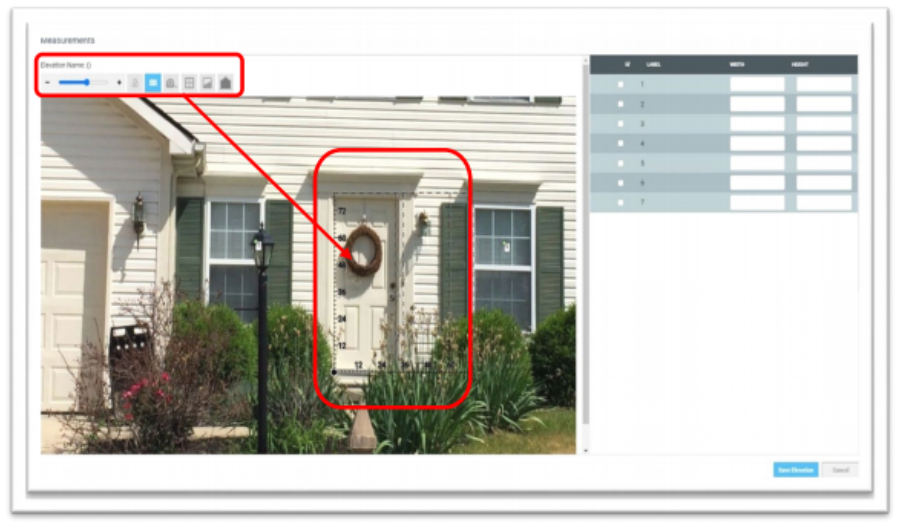
10. To measure and add the window measurements, click the window icon in the upper left hand tool bar. Click in the upper left corner of a window and drag the box to the bottom right corner to cover the window. You will see the measurements populate to the right of the screen. Note: To resize the size of the picture, use the slide rule at the top left with the plus and minus signs, to zoom in and out as necessary.
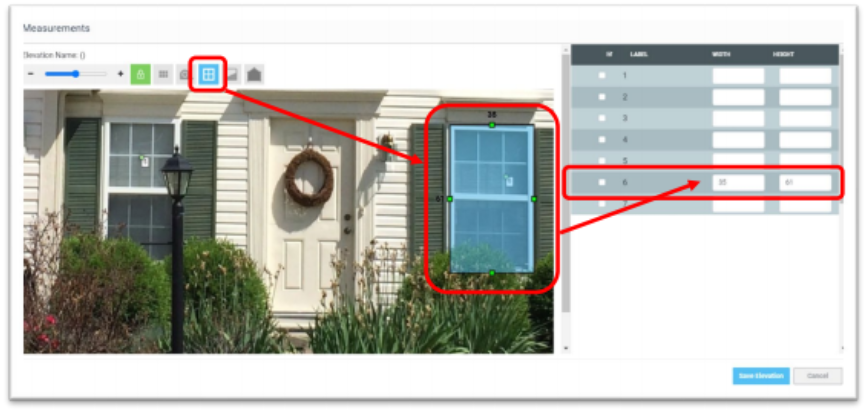
11. If there are multiple windows with the same measurements, click the boxes to the left side of the windows as shown below (right side of the snapshot). When multiple windows are selected and the measurements are entered for one window, the measurements will automatically apply to all the highlighted windows. After all the window measurements are entered, click the “Save Elevation” button at the bottom to save the information.
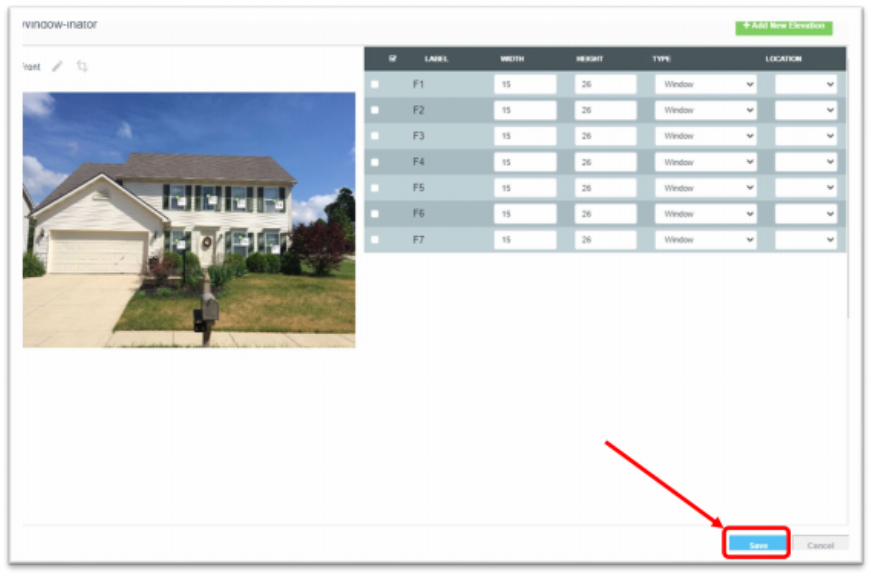
12. You will be prompted with a review screen, showing all the windows and the measurements. To the right side of each window, there is a drop-down list for Location. This allows the windows to be identified with various rooms in the house (i.e., bedroom, kitchen, bathroom, etc.) After reviewing all the information, click “Save” at the bottom of the screen to save the information.
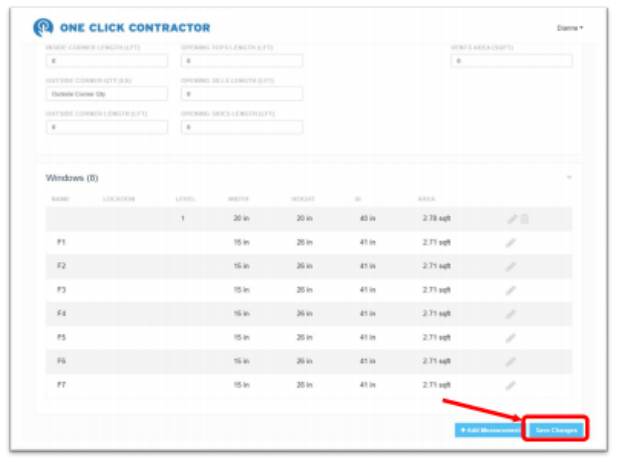
13. You will be redirected back to the measurements tab where your window measurements will be listed at the bottom of the screen. Click “Save changes” at the bottom of the screen.
Create the Estimate
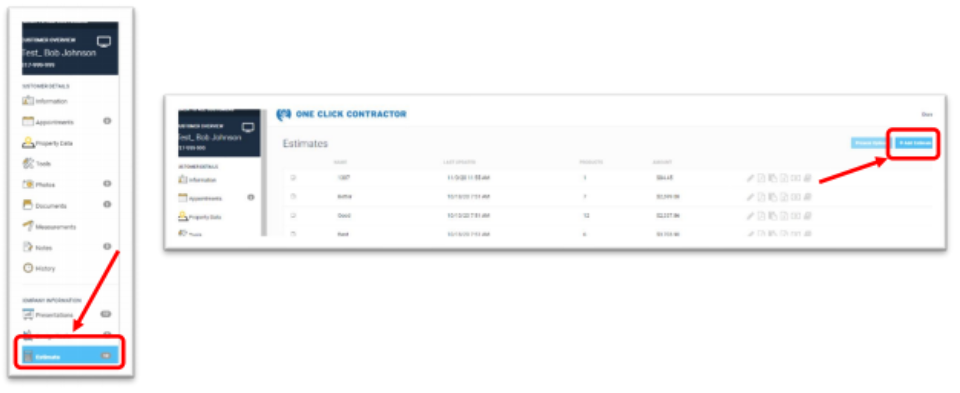
From your customer’s account/job, click on the Estimates Tab on the left-hand tool bar. Then
click “+Add Estimate” button in the top right side of the screen.
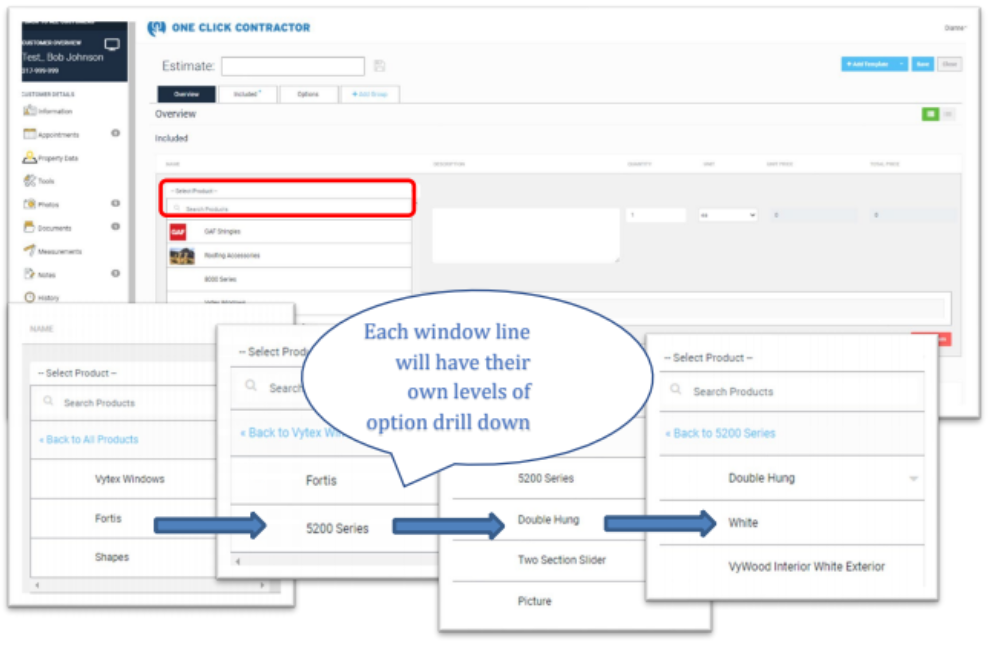
Select the window product line from the “Select Product” drop down list. Click on the window line to begin adding the windows to the Estimate. Continue selecting the appropriate window specifications to end on the screen where you begin selecting the appropriate window sizes. Note: The levels of product drill down depend on the complexities in your window line from the manufacturer.
Once all the product drop downs are selected the specific window is chosen, your measurements will automatically appear on the screen (as shown below), Click “Select All ” to select all the windows, if appropriate. Otherwise, select the individual windows to allow for individual options if they differ from window to window. Note: When selecting multiple windows, any option selected will be applied to all of the windows in the group.
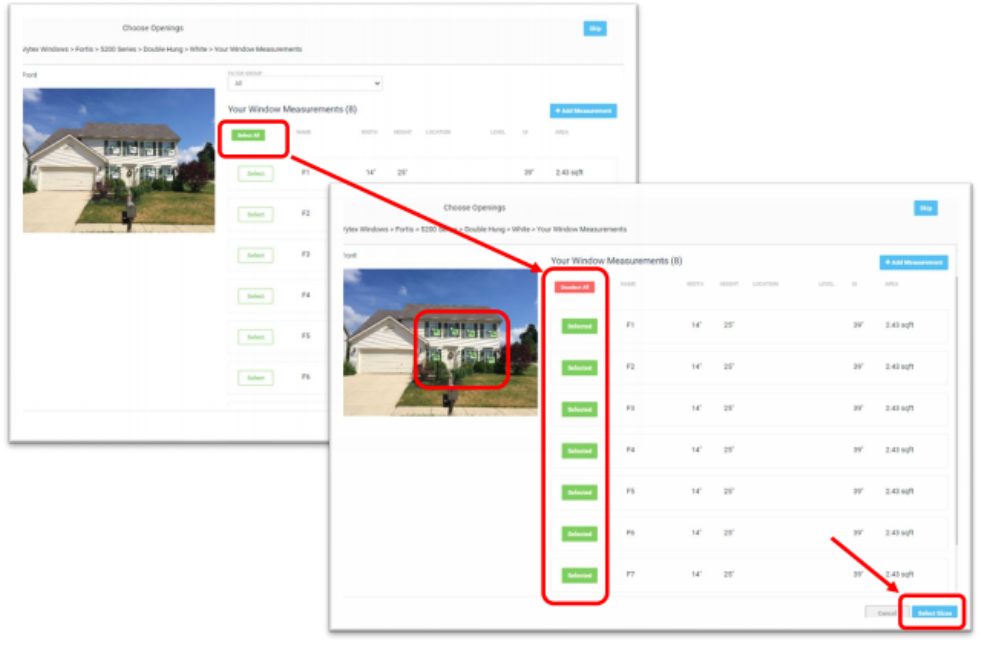
If “Select All” is clicked, each of the “Select” buttons (for each picture) will turn green and show “Selected” and the windows on the house picture will also turn green. This confirms all the windows have been chosen. The next step is to click “Select Sizes” in the lower right corner of the box.
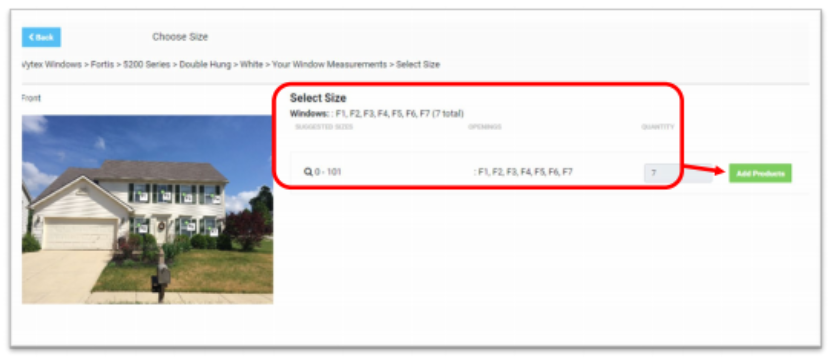
The dialogue box below will appear showing the windows selected with the labels (F1, F2, F3, etc.) to confirm the windows chosen and it will show the quantity in the gray box (7). Click “Add
Products” to add these windows to the Estimate.
After the windows are added to the Estimate, the dialogue box below will appear allowing you to
choose the appropriate window options.
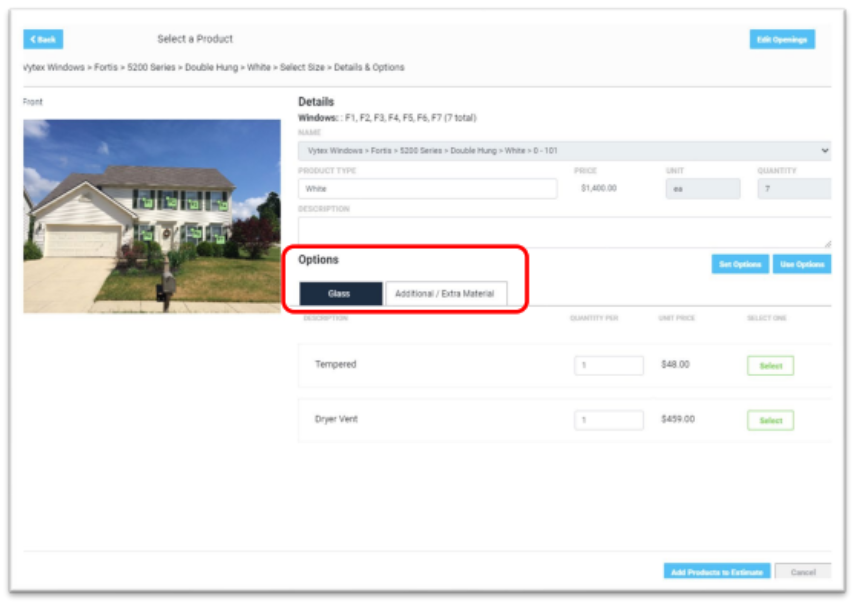
The next step is to click on the individual Option tabs to select the options (i.e. glass, grids, extras, etc.) Click the “Select” button to the right side of the Option and adjust the quantity appropriately. After all Option tabs have been chosen, click the “Add Products to Estimate” button in the lower right corner.
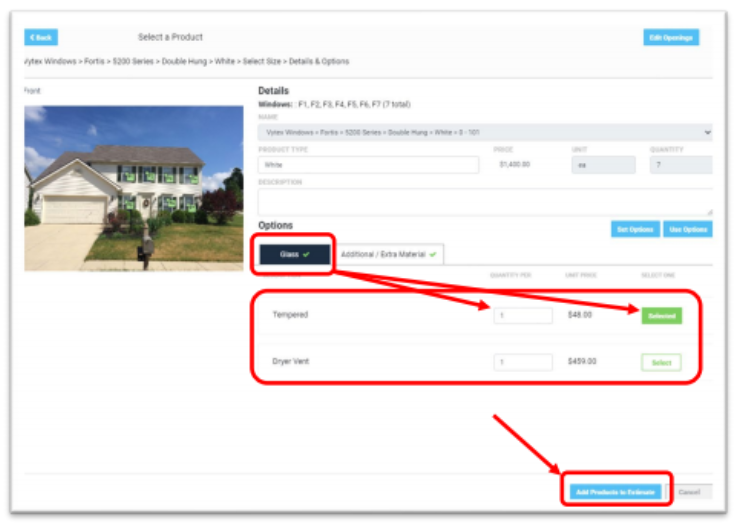
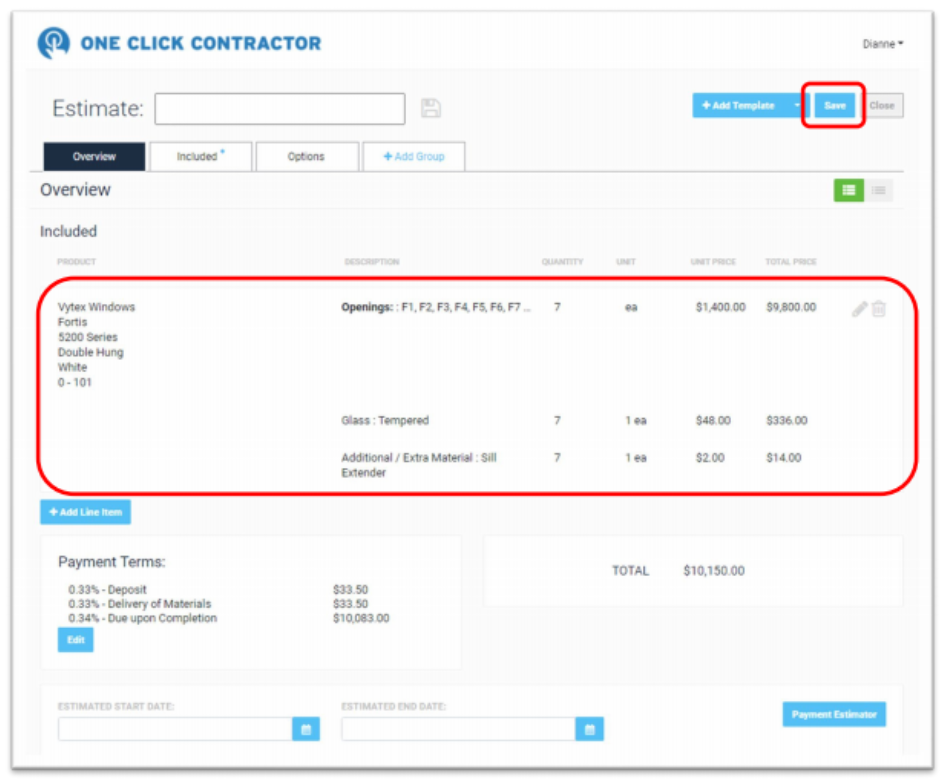
At this point, more line items can be added, or this could be the entire order. Either way, you will continue with the Estimate as usual. At this point, the window line item can be edited by using the Pencil icon as normal. Once the Estimate is complete, follow your normal procedure of adding any Payment Terms and/or Discounts, click Save and move the Estimate to a Proposal or Agreement.
