![Icon for Courses-1.png]](https://help.oneclickcontractor.com/hs-fs/hubfs/Icon%20for%20Courses-1.png?width=36&height=36&name=Icon%20for%20Courses-1.png)
Calendar Options lists connected calendar providers and a Sync setting for each calendar. You can also open the provider selection screen for a new account.
Step by step
1. Review connected calendars. Open Calendar Options and review the Provider, Profile, Calendar Name, and Sync columns.
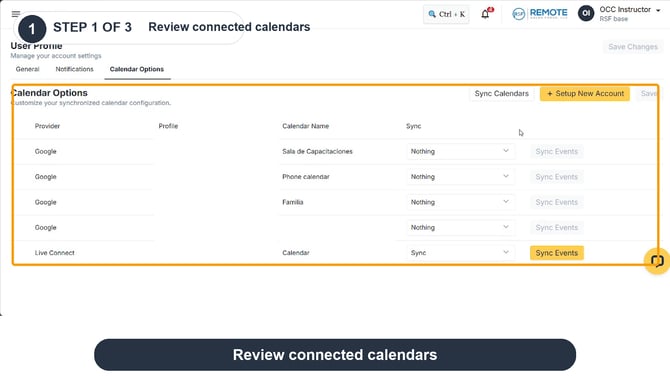
Review connected calendars
2. Choose a sync mode. Open a calendar’s Sync menu. The available modes are Nothing, Push Only, Pull Only, and Sync. Select the mode appropriate for that calendar and save the change.
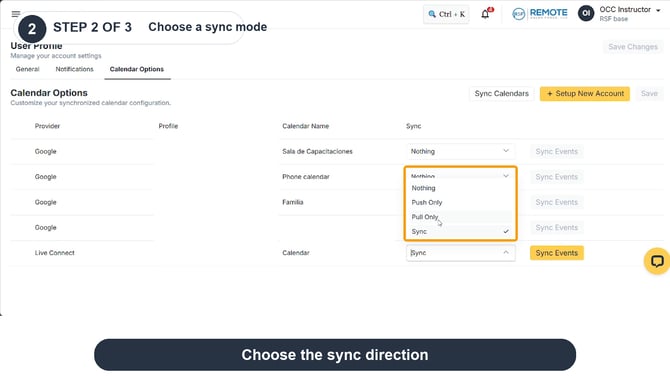
Choose a sync mode
3. Start a new connection. Click Setup New Account to open the calendar provider choices. Select your provider and follow its authorization prompts. Confirm the connection is listed when you return to Calendar Options.
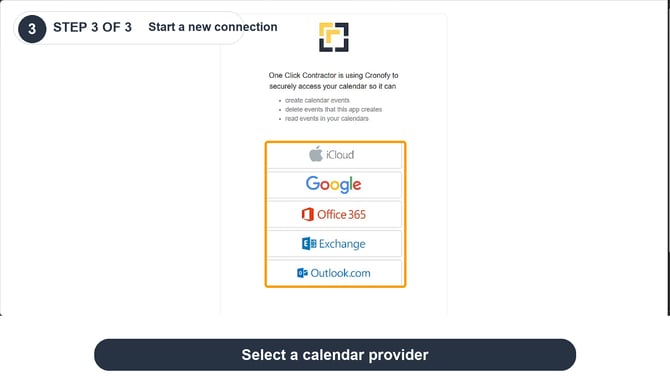
Start a new connection
Remember
-
What you see can differ depending on your organization's settings and your permission level. Tab names, headers and available options are configurable. If you can't see or do something described here, ask your manager first. They can contact support.
-
Sync Events is available for a connected calendar with Sync selected; it is disabled for calendars set to Nothing.
-
Provider choices include iCloud, Google, Office 365, Exchange, and Outlook.com.
-
Connecting a calendar can grant access to read events and create or delete events the app creates; review the authorization screen before continuing.