![Icon for Courses-1.png]](https://help.oneclickcontractor.com/hs-fs/hubfs/Icon%20for%20Courses-1.png?width=36&height=36&name=Icon%20for%20Courses-1.png)
The Appointments tab is used to schedule, manage, and track meetings associated with a customer file.
Step 1: Schedule an Appointment
Step 1:
In the Customer file:
-
Select the Appointments tab.
-
Click Add Appointment.
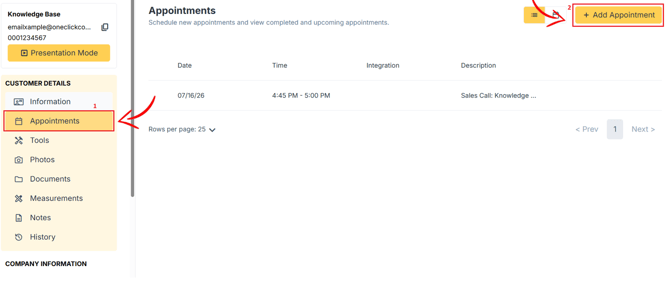
Step 2:
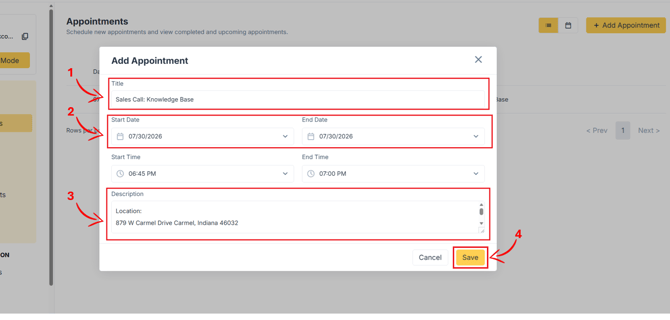
- Update the appointment title if needed.
- Choose a date and time from the calendar view.
- Add a brief description to clarify the purpose of the meeting.
-
Click Save.
Step 2: Update or Reschedule an Appointment
-
Open the Appointments tab.
-
Locate the appointment on the calendar.
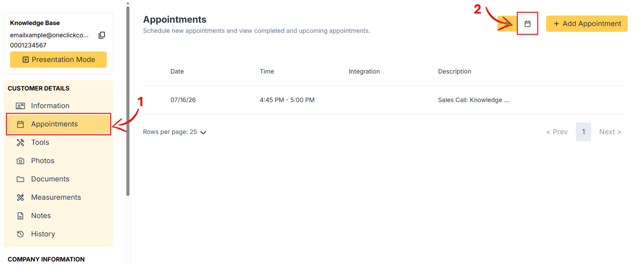
-
Click and drag the appointment to a new date or time.
-
Click outside the calendar to save the change.
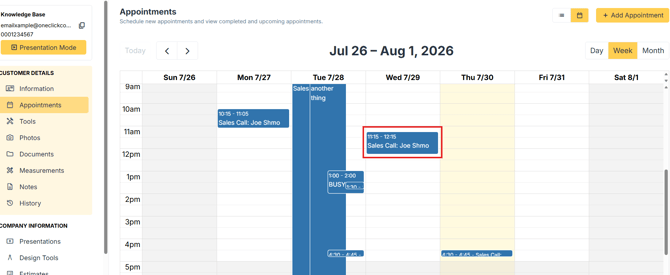
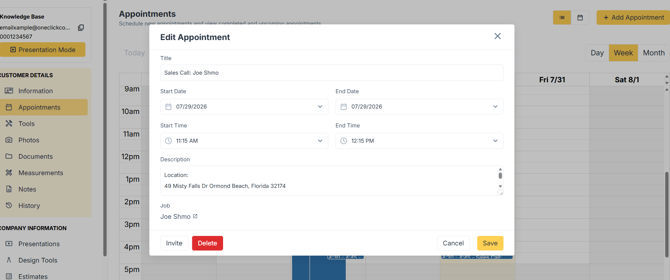
- You can also select the appointment event, which will pop up a new window for you to update the event information.
Step 3: Send an Appointment Invitation
-
Open the Appointments tab.
-
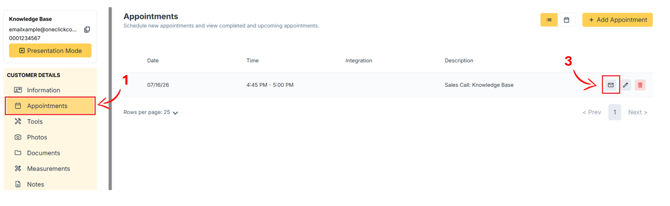
Hover the cursor/tap on the appointment you want to send an invite about.
-
Click/Tap on the Mail Icon.
-
Review the auto-filled email details.
-
Click Send Invite.
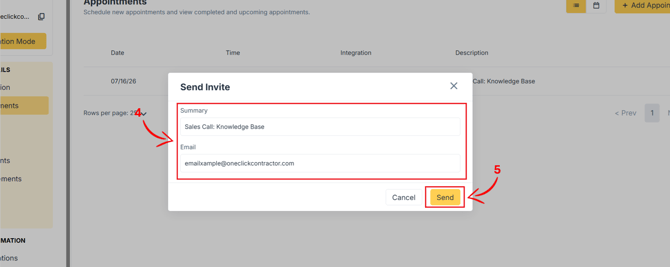
The customer will receive an email with the meeting details and a Join Meeting option when applicable.
Appointment History
All scheduled and completed appointments remain visible in the Appointments tab for historical tracking. This provides a timeline of customer interactions tied to the job.
For the full guide, see Scheduling and Managing Customer Meetings.