![Icon for Courses-1.png]](https://help.oneclickcontractor.com/hs-fs/hubfs/Icon%20for%20Courses-1.png?width=36&height=36&name=Icon%20for%20Courses-1.png)
Step 1: From the saved estimate, select Price Presentation. The first configured presentation slide opens.
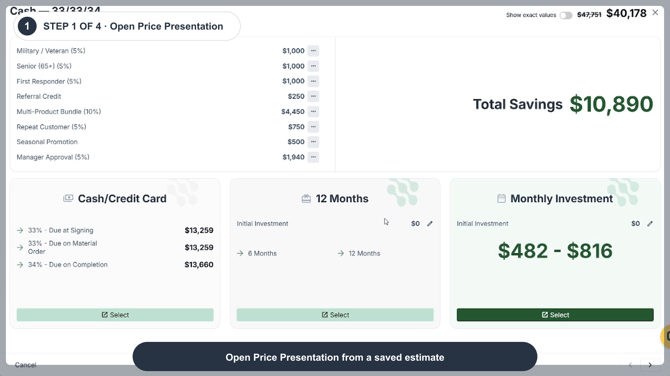
Image description: Open Price Presentation from a saved estimate.
Step 2: In the discounts and Total Savings area, review the applied discounts and total savings. To see the actions available for a discount, select its ellipsis icon.
Depending on configuration and permissions, the menu can include Add Flat Discount, Current Promotions, and Delete Discount.
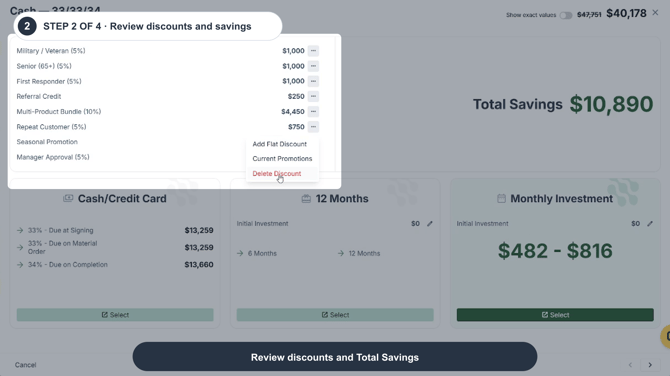
Image description: Review applied discounts, total savings, and the available discount actions.
Step 3: At the top right of Price Presentation, turn on Show exact values to display cents in totals and payment ranges. Turn it off to return to rounded values. This changes only the display, not the estimate.
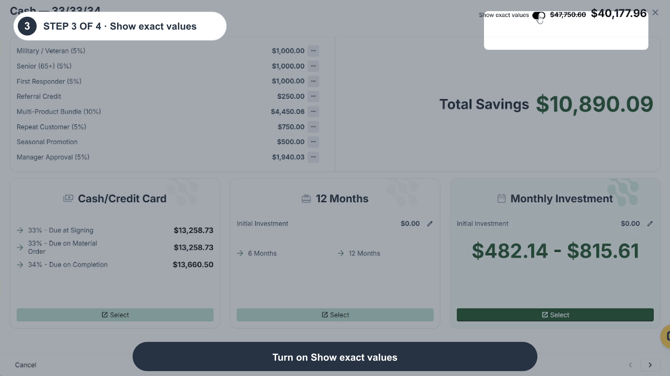
Image description: Turn on Show exact values to display cents.
Step 4: In the payment option cards, compare Cash/Credit Card, Same as Cash, and Monthly Investment using the payment structure, initial investment, term, or displayed range. Use the bottom-right arrows to view other configured slides, then select on the option.
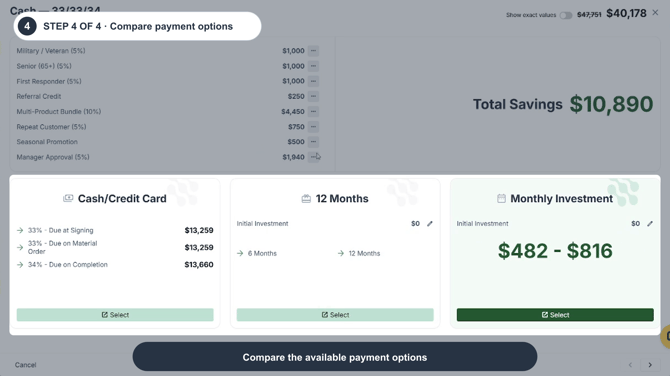
Image description: Compare the available payment options and select the customer's choice.
💡 Important notes
-
Available slides, labels, payment terms, discounts, and finance options are configured by the organization and can differ from the examples shown.
-
Discount actions appear only when the organization's settings and the user's permissions allow them.
Remember
-
Price Presentation reflects the settings configured for your organization and the data on the current estimate. .
-
What you see can differ depending on your organization's settings and your permission level. Tab names, headers and available options are configurable. If you can't see or do something described here, ask your manager first. They can contact support.