![Icon for Courses-1.png]](https://help.oneclickcontractor.com/hs-fs/hubfs/Icon%20for%20Courses-1.png?width=36&height=36&name=Icon%20for%20Courses-1.png)
Access required
You need access to Administration and Financing & Pricing. Open the Finance Options section. If Financing & Pricing is not visible, contact a manager or administrator who manages user access.
Step 1: In Finance Options, select + Add.
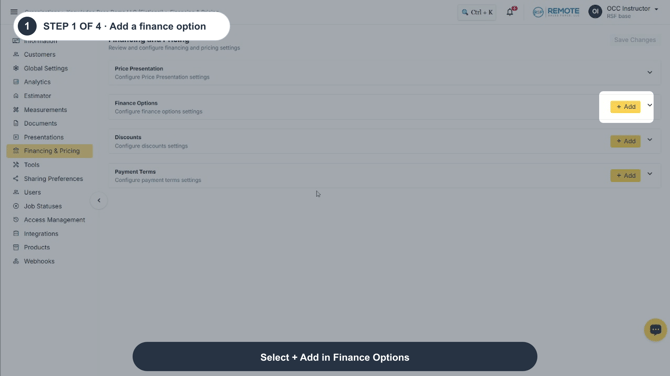
Image description: Select + Add in Finance Options.
Step 2: Complete the Basic Info fields. Enter a clear Name, choose the Status, and select the Service Provider. Add the Apply Now URL and Merchant Fee when they apply.
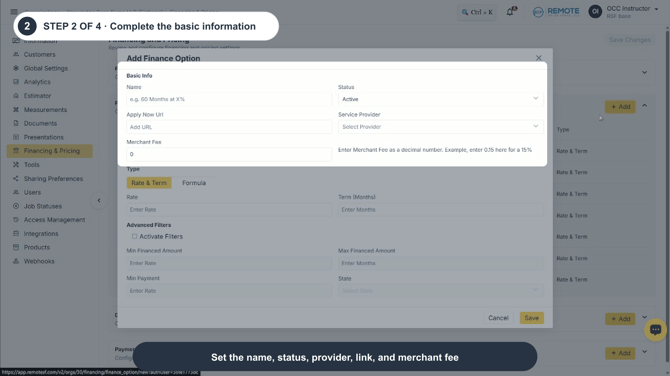
Image description: Set the name, status, provider, link, and merchant fee.
Step 3: Choose the option Type. Fill all relevant information.
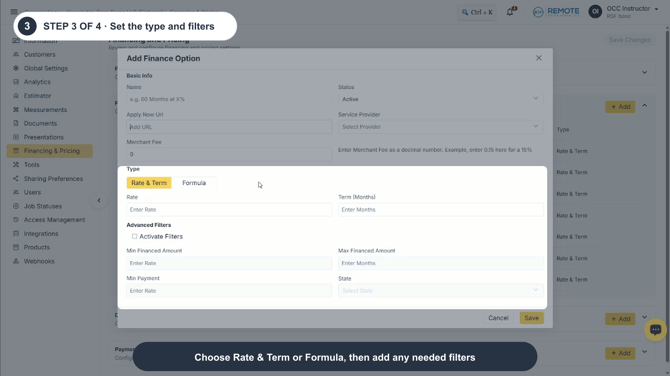
Image description: Choose the finance option type and add any required filters.
Step 4: Manage existing options from the Finance Options list. Hover over a row to reveal the drag handle, pencil, and trash icons. Use them to reorder, edit, or delete the option. To change availability, edit the option and update its Status.
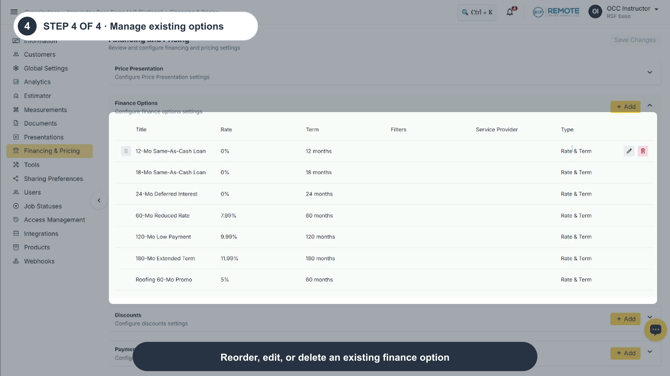
Image description: Reorder, edit, or delete an existing finance option.
Remember
-
Finance options can affect what users are able to present or select.
-
What you see can differ depending on your organization's settings and your permission level.
-
Tab names, headers and available options are configurable. If you can't see or do something described here, ask your manager first. They can contact support.