![Icon for Courses-1.png]](https://help.oneclickcontractor.com/hs-fs/hubfs/Icon%20for%20Courses-1.png?width=36&height=36&name=Icon%20for%20Courses-1.png)
Requirements
-
Sign in to OCC as an administrator for the organization you are configuring.
-
Have the JobNimbus API key and administrator access to the JobNimbus account.
-
Decide whether this OCC integration will use the Job or Contact type. The type determines which JobNimbus records are synchronized.
Connect JobNimbus and configure OCC settings
Open JobNimbus from the organization's Integrations page. In OCC, open the organization, select Integrations, and open the JobNimbus integration card.
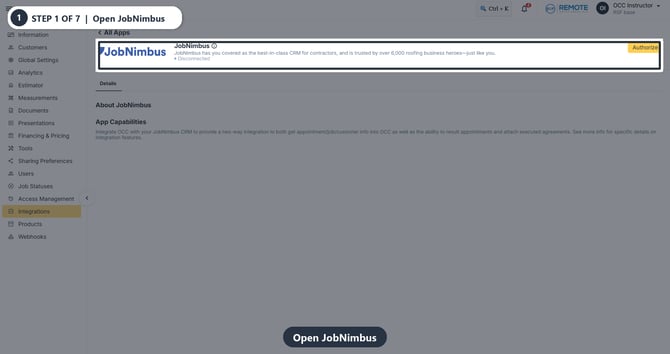
Current OCC Integrations page with the JobNimbus card highlighted.
Select Authorize. On a disconnected card, select Authorize to open the JobNimbus authorization dialog.
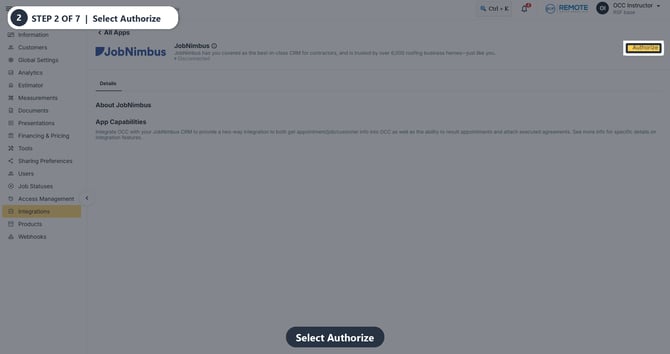
JobNimbus integration card in its disconnected state with Authorize highlighted.
Complete the JobNimbus authorization dialog. Select Job or Contact under Type, enter the JobNimbus API key, and select Authorize. If the integration is already connected, select Reauthorize to open the dialog. The supplied recording shows the Job type selected; choose the type that matches the records you want OCC to receive.
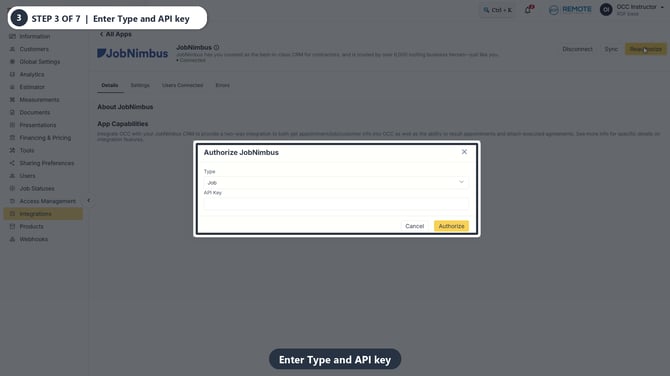
JobNimbus authorization dialog from the supplied recording. The captured organization is connected and the API key value is concealed; Job is selected in the Type field.
Select Sync after the card shows Connected. Use Sync to request an initial or manual synchronization. A success toast confirms that OCC accepted the request; it does not state that every record has finished processing.
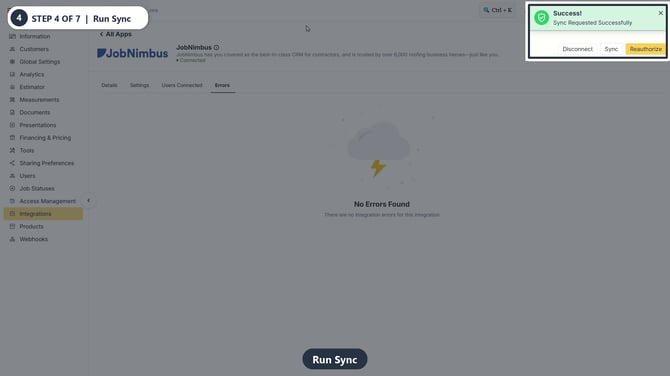
Connected JobNimbus integration with the successful Sync Requested notification highlighted.
Review Users Connected. Check that JobNimbus users appear in the list and compare the JobNimbus User, One Click Contractor User, and Status columns. Matching email addresses are linked automatically; only active mappings can be used for synchronization and assignments.
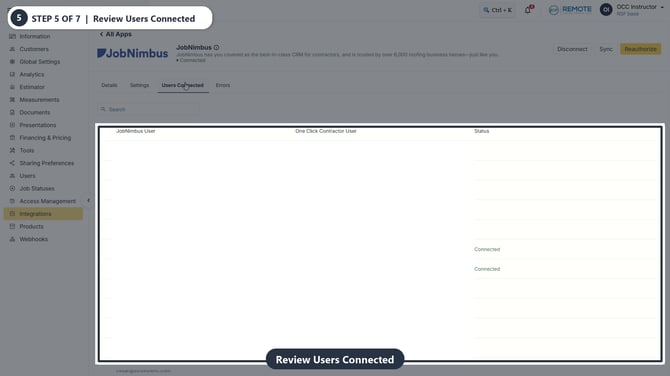
JobNimbus Users Connected table. Organization details, names, and email addresses are concealed.
Manually match an unmapped user. On the user's row, select the edit pencil. In the JobNimbus User Match dialog, select the corresponding One Click Contractor user, keep Active selected, and select Save.
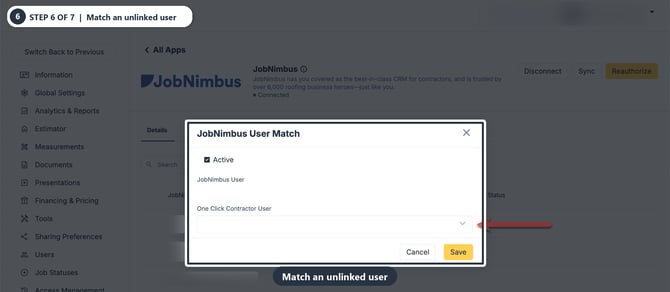
JobNimbus User Match dialog with the OCC user selector and Save control. User identifiers are concealed.
Choose the document attachment preferences. Open Settings and expand Document Attachment Preferences. Select the events that should attach OCC documents to JobNimbus, then select Save Changes. Available groups are Proposal (Button, Email), Agreement (Button, Email, Sent, Signed, Result Signed), and Signable Documents (Sent, Signed). The capture shows one organization's saved selection state, not a recommended default.
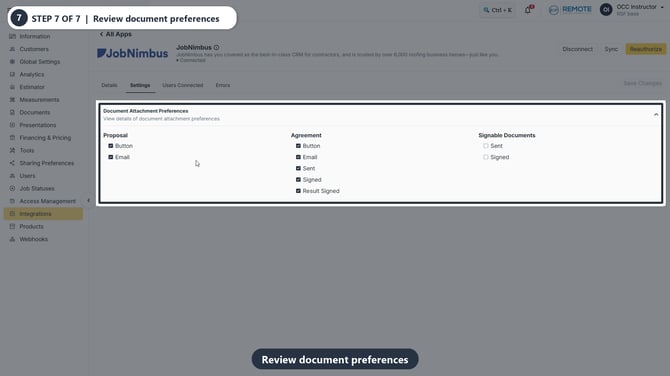
Current JobNimbus Document Attachment Preferences panel. The checkboxes show the captured organization's settings; Save Changes is disabled in the captured state.
Remember
What you see can differ depending on your organization's settings and your permission level. Tab names, headers, and available options are configurable. If you cannot see or do something described here, ask your manager first. They can contact support.
Document Attachment Preferences control when OCC documents are attached to JobNimbus. Check the saved selections in your organization's integration settings before relying on them.