Webhooks can be utilized by Org Admins who are building custom integrations and need to know when an event is triggered (e.g. Salesforce/NetSuite or other custom development).
Webhooks are available when accessing the Administration section of OCC. They can be found and configured from a new “Webhooks” tab available on the organization.
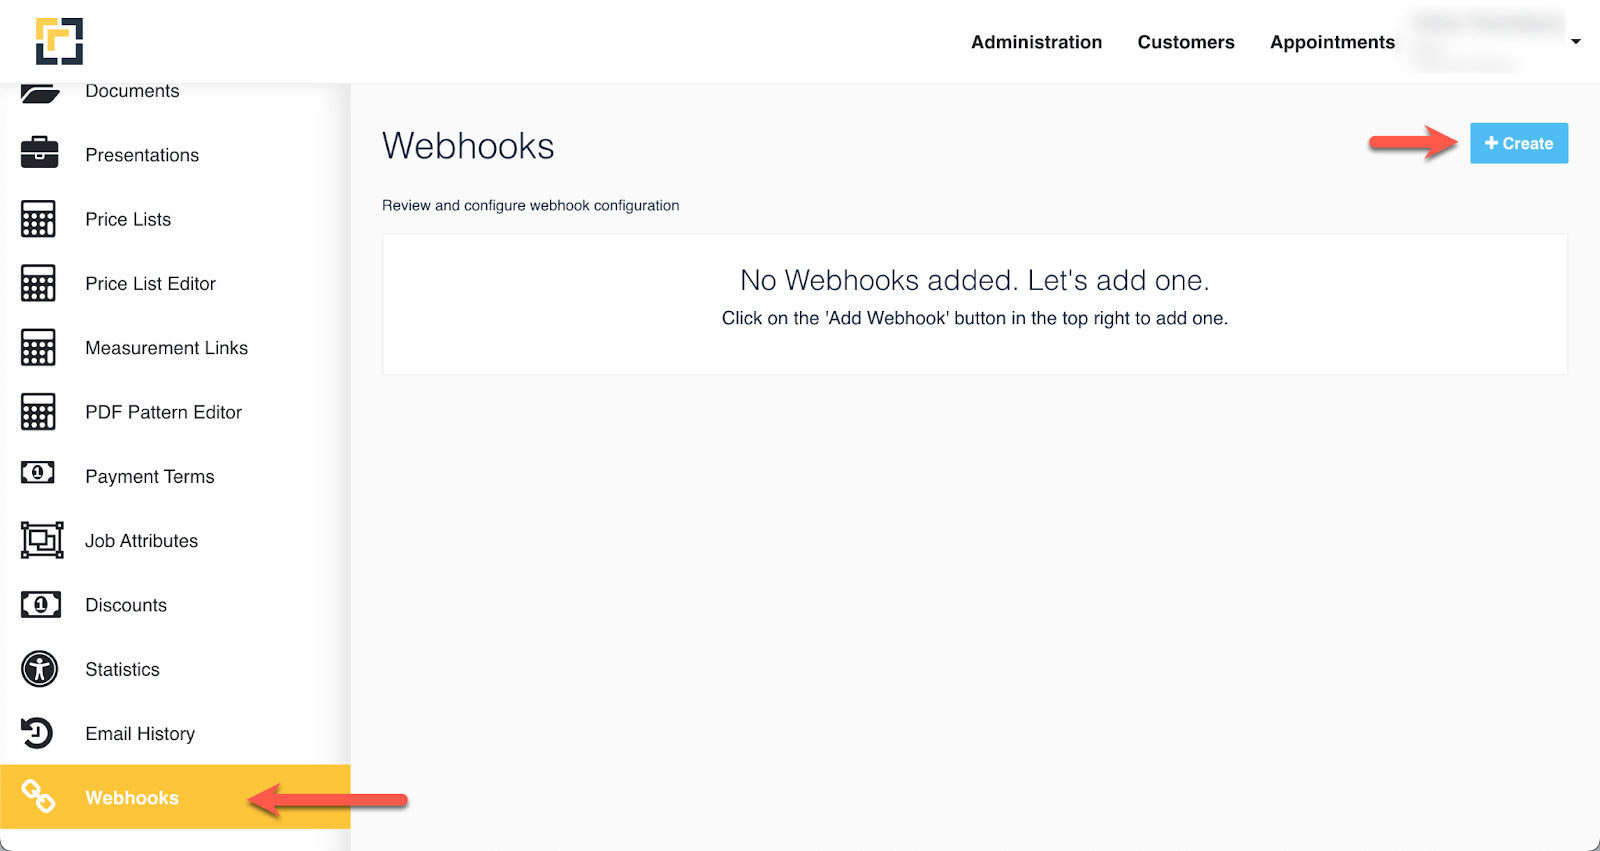
- When creating a Webhook, you will need to fill out the following items:
- Name
- Webhook URL
- Webhook Authentication Methods
- You can use No Auth or Basic Auth (depending on the receiving system).
- Events to send
- There are a number of different events and types which are organized by kind. For more details and specifics on the types of events, reference the Webhook Delivery section of this document.

Note: When adding a webhook the URL MUST be https. We do NOT send webhooks to non-secure URLs.
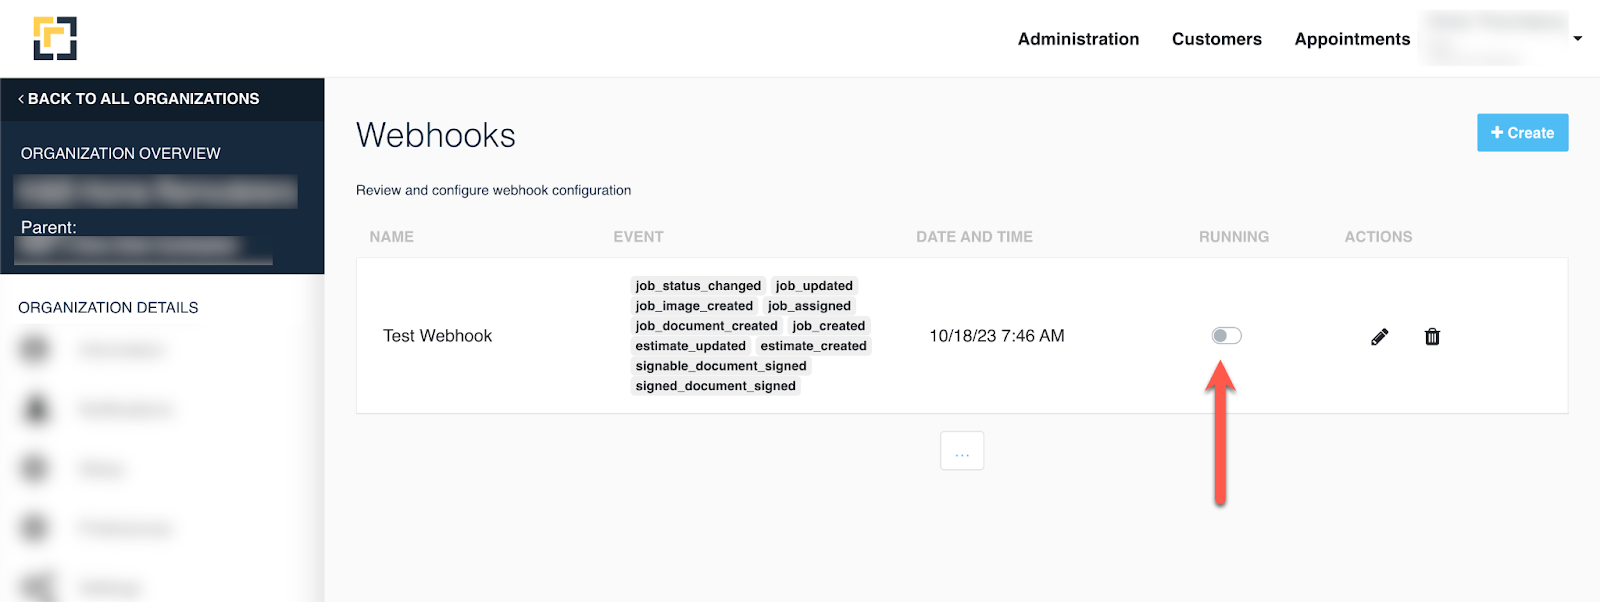
Once you’ve created a webhook, you’ll be taken back to the webhook listing where you can view a list of the webhooks and check the status.
By default, when you create a webhook, it will be in a “deactivated” state. To turn it on, simply toggle the toggle button to the on position.
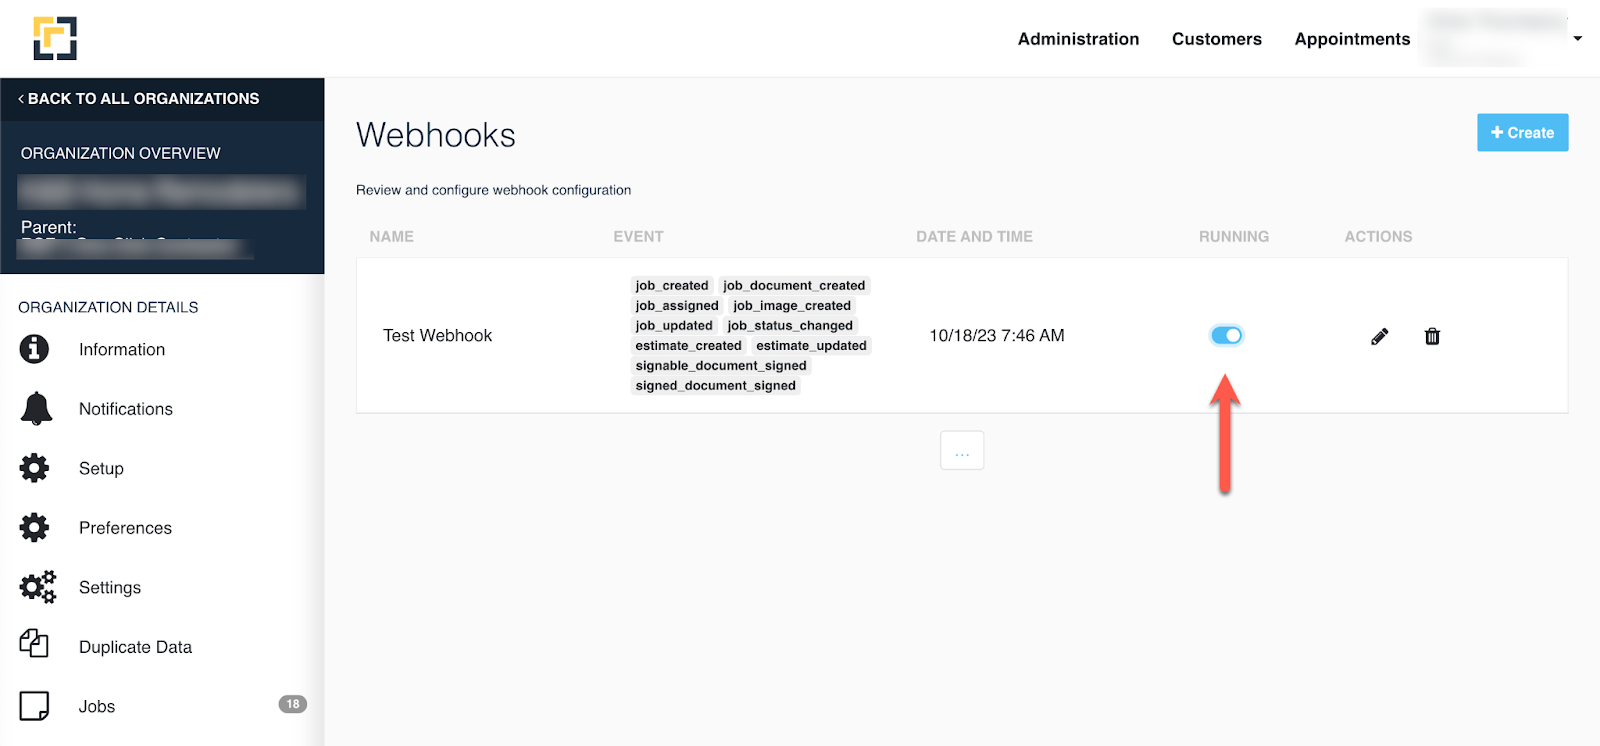
Once you’ve toggled it to the On position, the system will begin delivering payloads to your endpoint once one of the selected events is triggered. It will be indicated as “activated” when it looks like the screenshot below.
Debugging webhooks is also supported on this screen. To access or edit the webhook, click the pencil next to the specific webhook to bring back up the detail screen.
On the detail screen, there is a section called “Log History” which will include all of the webhook events which are generated for this webhook.
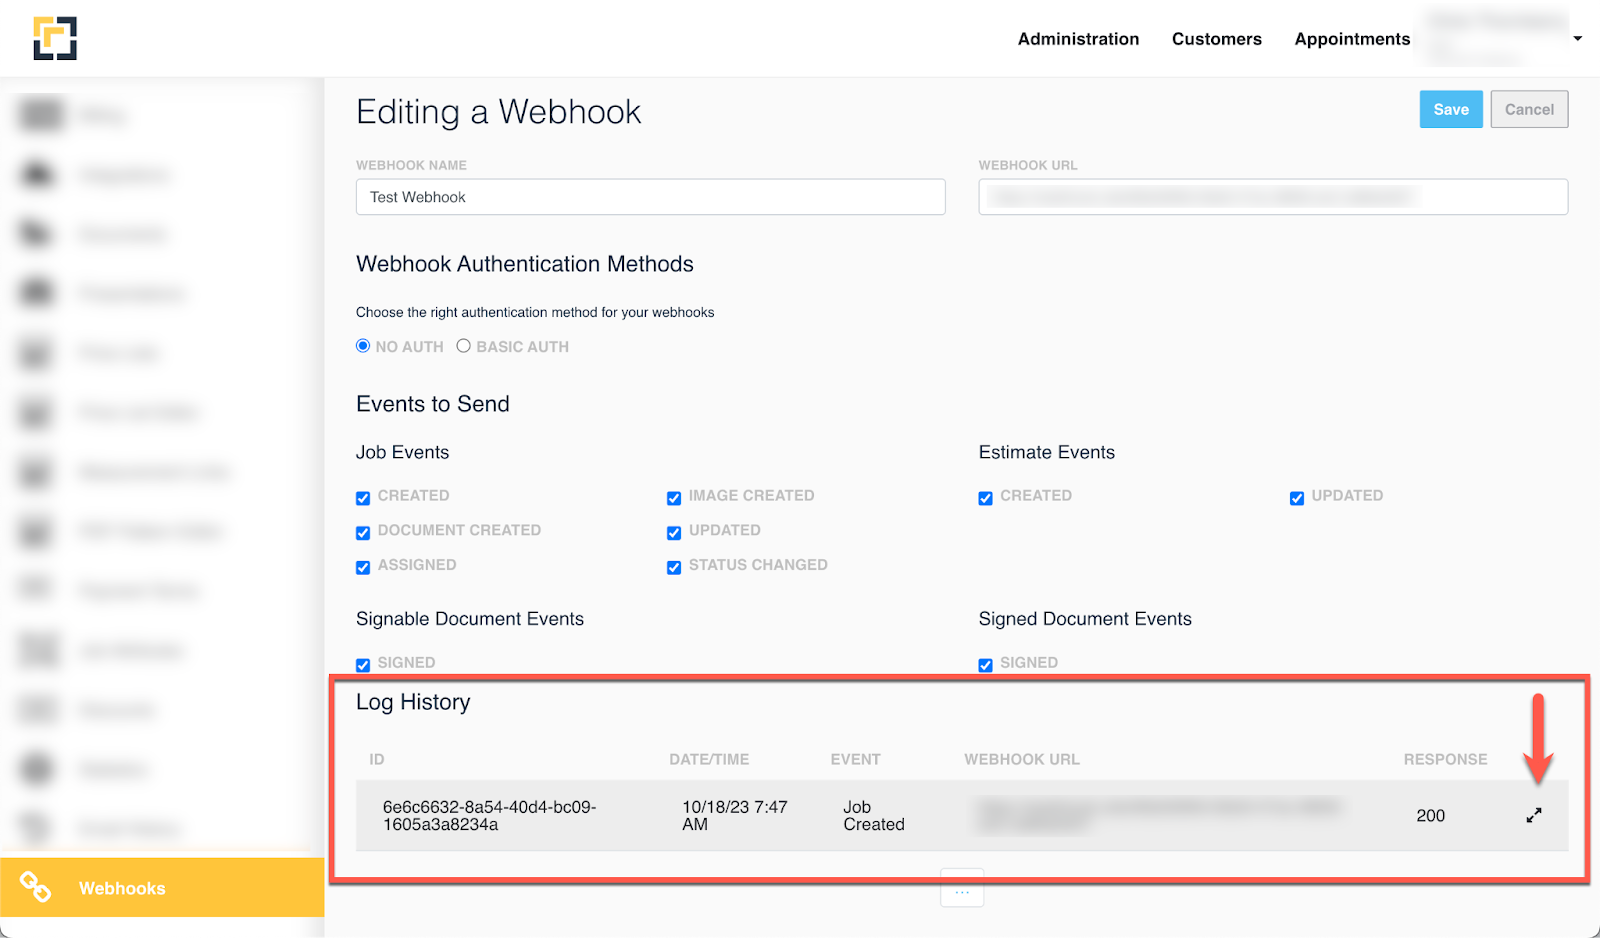
- For each of these items, the following information is displayed:
- ID: The internal id of the event sent to the system
- Date/Time: - The date/time the event was created
- Event: The type of event (Job Created, etc.) which was sent
- Webhook URL: The endpoint which was called
- Response: The latest response returned from the receiving URL (HTTP status code)
- You’ll also notice there is an expand icon which is available to view details.
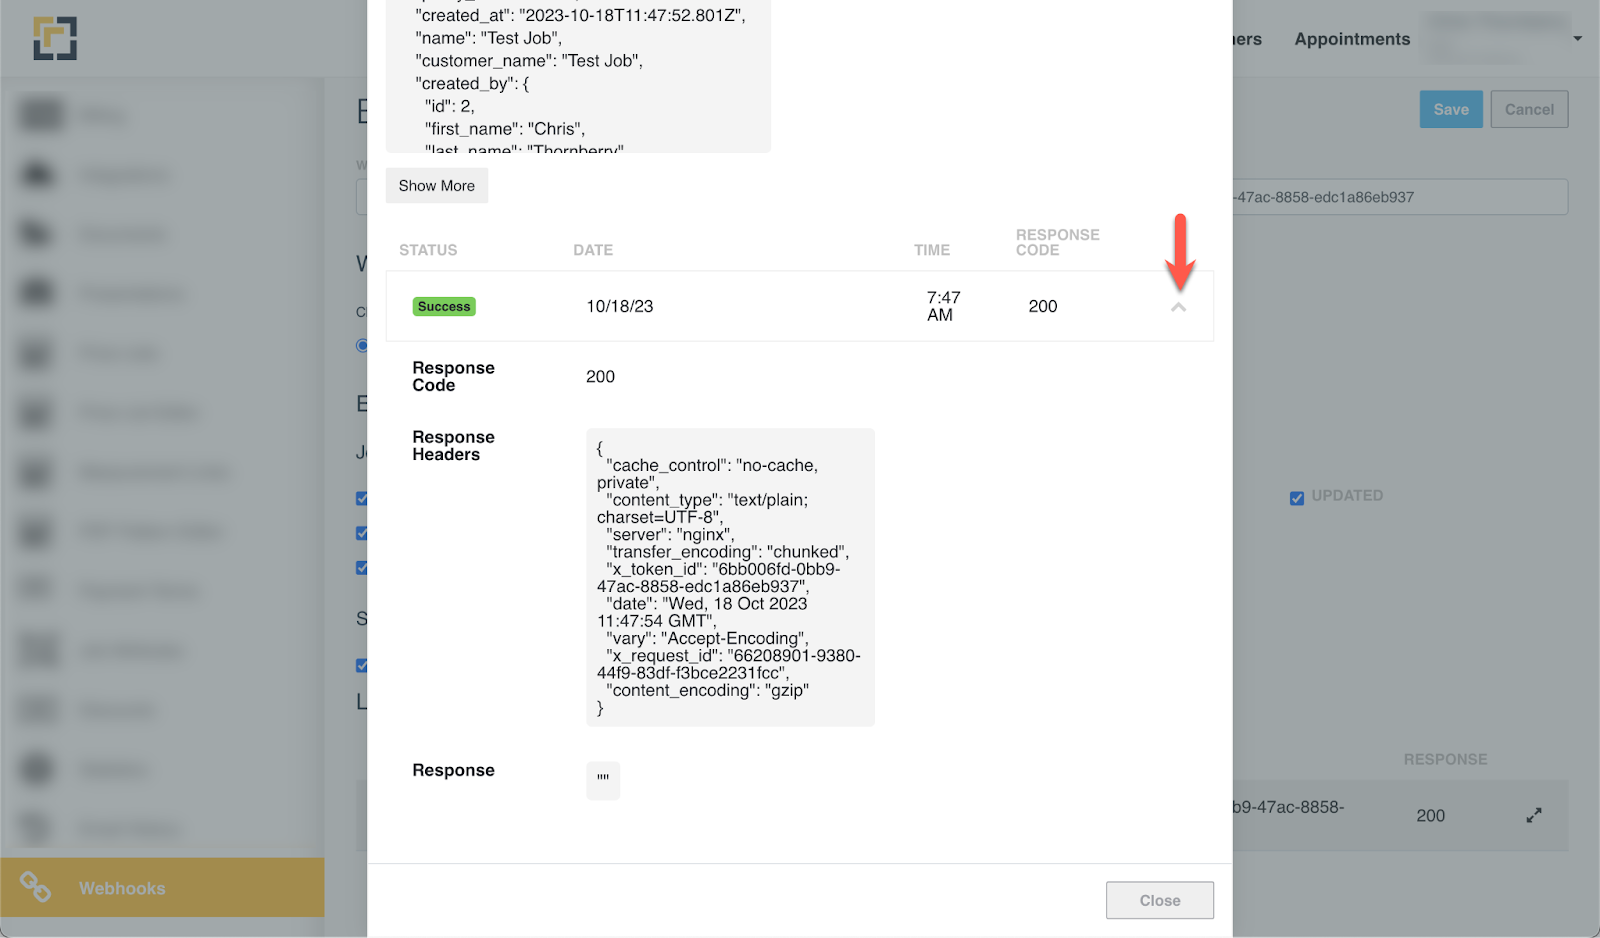
- The Log History Modal also has additional information:

- ID, Event, and Webhook URL same as the previous screen
- Payload, which includes the full JSON payload of all the data included in the webhook.
- Webhook Attempts - The system expects to receive an HTTP 2xx response when it sends a webhook to the URL.
- If the system does NOT receive a 2xx response, it will retry again in 5 minutes.
- If it fails again in 5 minutes, it will attempt again in 10 minutes.
- At the point it has failed 3x it will not retry again.
- For each of the attempts, the system logs the status, date, time, and response code returned from the endpoint which was called.
To find more details out about each attempt, you can click to expand the accordion next to each attempt to expose the Response Code, Response Headers, and Response Body for each attempt.