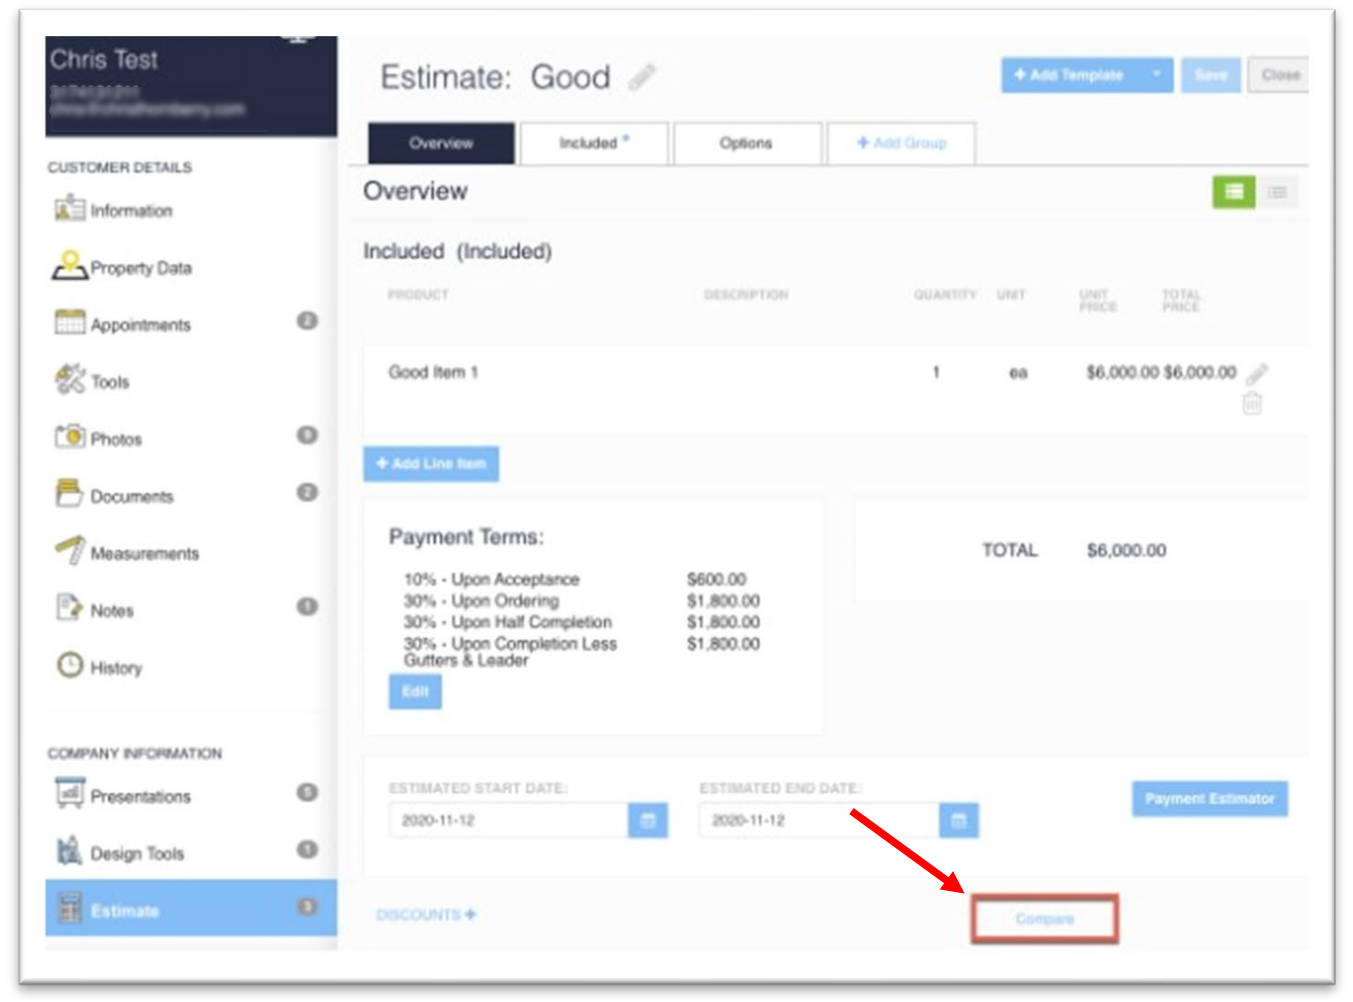
To access Price Presentation for comparison, open a saved Estimate or create a new one and save it. Scroll down below the Payment Terms to find the blue “Compare” link to the right of Discounts.
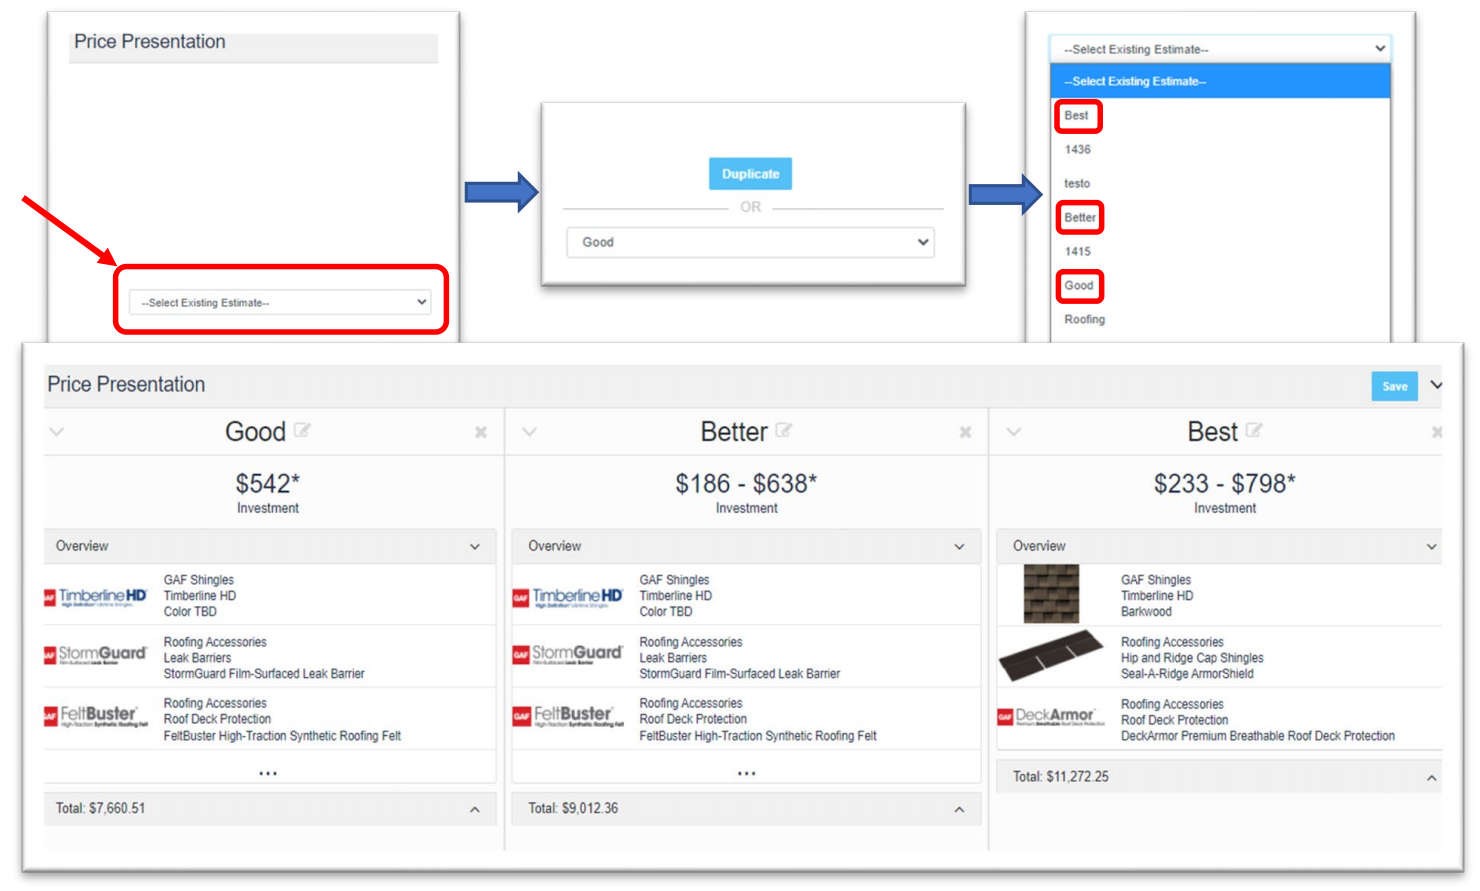
Once you click on the “Compare” link (above), a dialogue box will appear allowing you to select an Estimate to compare. Either the saved Estimate you are working with will populate or you will need to click the drop-down box to select the Estimates to compare. There is also an option to duplicate an estimate for comparison purposes. Three Estimates can be selected for comparison.
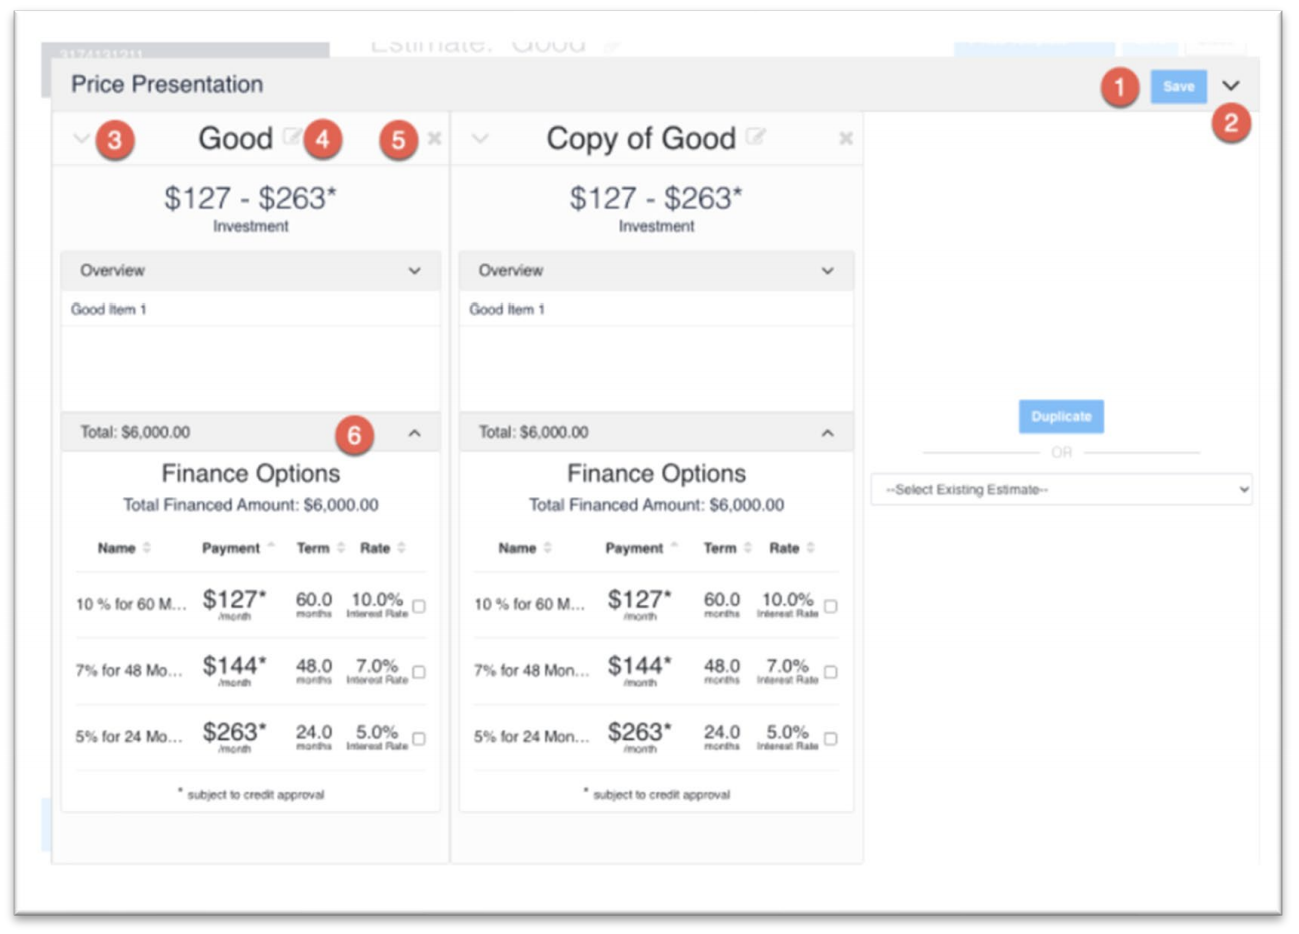
Things you can do on this view are referenced below.
- Save the Price Comparison for future reference.
- Close that specific Price Presentation by clicking on the down arrow to the right side of the screen.
- Save the Estimate comparison and go back to the Estimate itself (Useful if changes need to be made to the scope of work.)
- Editing the Estimate Name by clicking on the pencil to the right side of the name.
- Remove this estimate from the Comparison by clicking on the “x” in the top right corner.
- Click the arrow to the right of the Total to expand the Total to access additional features. Payment Terms, Discounts etc. which are editable from this view vs going back to the estimate itself. This also allows for a more extensive comparison between Estimates.
With the Finance Options you can display a single Investment/Monthly payment by selecting the check box next to the finance option of choice. If all options are selected, this gives a range of the Monthly Payment or Investment for comparison.
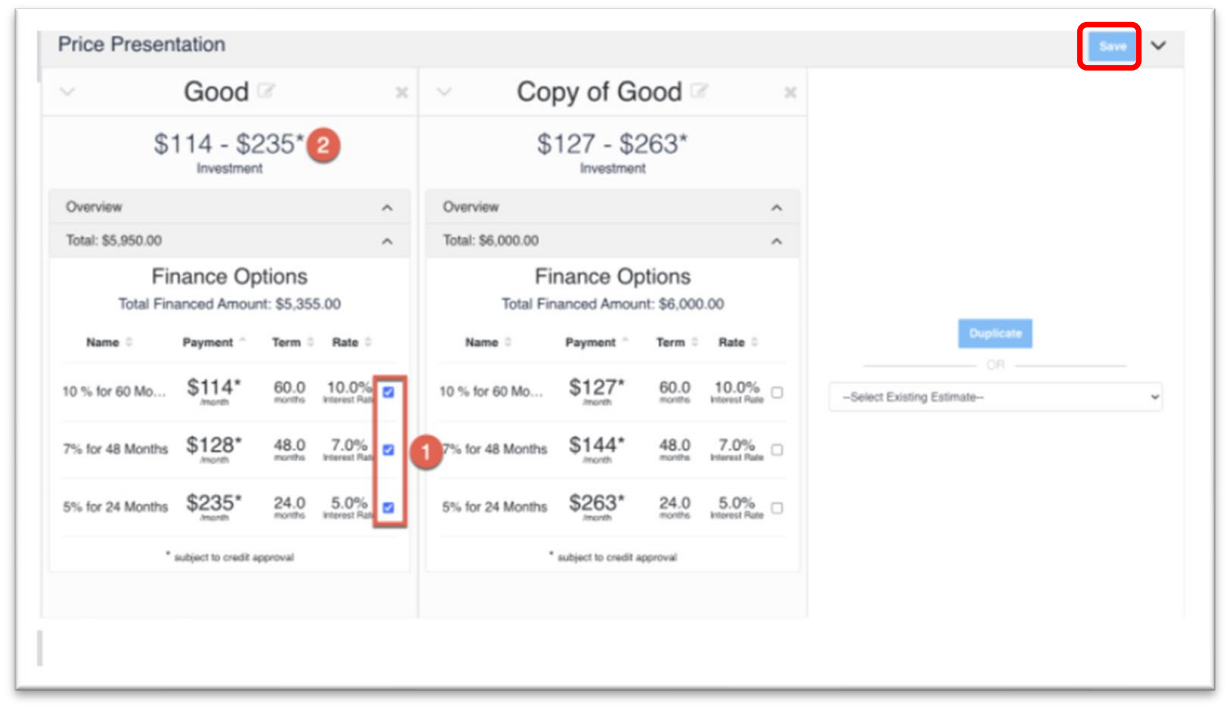
Once the finance options have been selected the Estimate and options can be saved by clicking the “Save” button in the top right of the screen.
Once the proposal is generated, the selected Finance Options will be displayed on the proposal for the customer to see as shown below
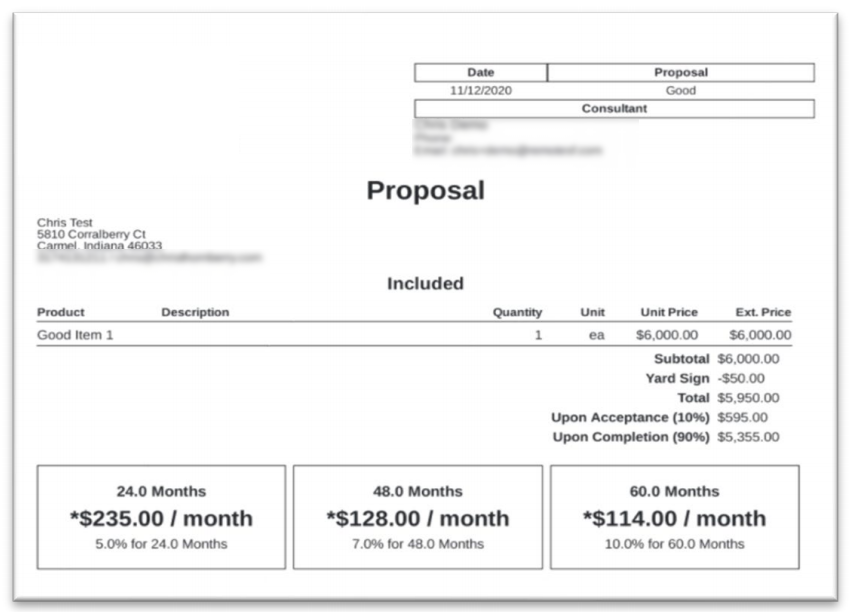
This provides an easy display of Payment Terms, Monthly Payment/ Month, Rate % for Term Months.
