
Each Customer document which needs a signature will require some coding on the backend from you. It’s important to understand what each character represents to ensure you have the correct coding for each instance of signature.
Here is the chart which describes the coding letters you will enter on the document templates. Whenever there is a name/signature/date line for either homeowner and/or the company person, coding is required on the document before it is loaded into the tool.
Here is the text key for Scribble

In order for the codes above to work, you must also match the Signature Settings in One Click Contractor appropriately.
In the One Click Signature Settings, the sequence where A=Customer 1, B=Company Representative, and C=Customer 2. You can add and remove signers as necessary. Each additional signer will be assigned a corresponding letter.
The “Title” column in the Signature Settings box below will be defaulted to either Customer or Representative. They can have an identifying “2 or 3” if there are more than one of the signers for either title. You can also rename the title if needed.
The “Signer” column choices are “job” or “salesrep”. The “job” is the customer and “salesrep” is the representative.
The Pricing column will only be used if the Estimate page requires initials on the estimate page. If it does, then a “ ” = true and “0” = false.
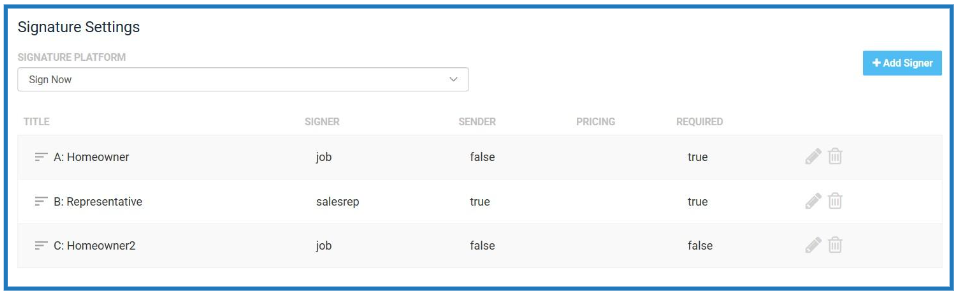
The Required column identifies whether a signing party is required to sign documents. At least one of the homeowners needs to be identified as required to sign.
When you begin “coding” for the documents with the name, signature and date areas, the sequence mentioned (A, B, C, etc) will help with understanding part of the coding process.
Once you have finished the fillable sections. Now it is time to code for signatures. The following image is an example of name, signature, and date lines as well as the coding behind the scenes. In the code, a “:” (colon) means a relation between the 2 codes, a “;” (semi-colon) signifies the next part of the code and “signera” or “signerb” identifies the corresponding party in the Signature Settings box below.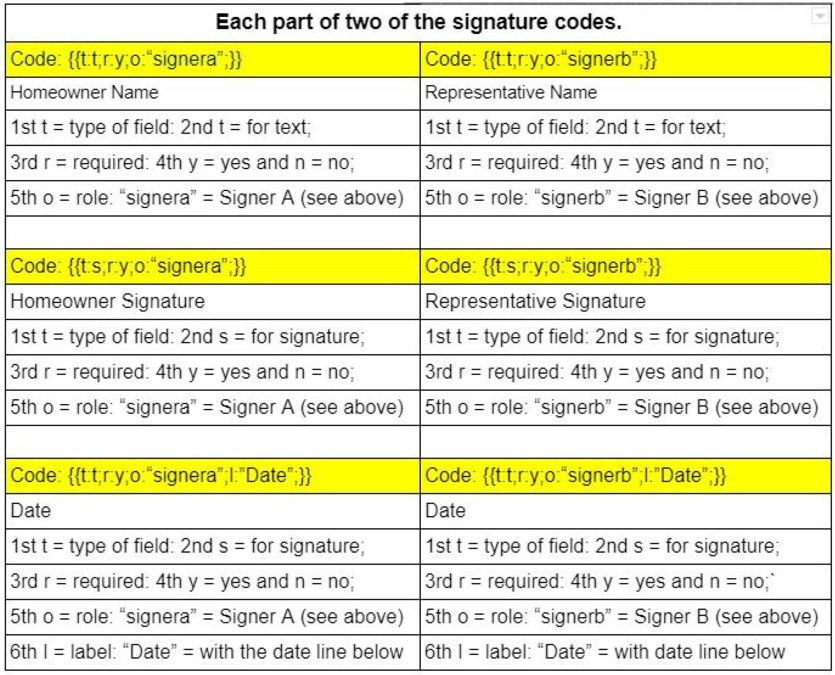
Long Code Example: