![Icon for Courses-1.png]](https://help.oneclickcontractor.com/hs-fs/hubfs/Icon%20for%20Courses-1.png?width=36&height=36&name=Icon%20for%20Courses-1.png)
Requirements
-
Access to the organization where you are configuring the integration.
-
Permission to manage organization integrations.
-
Confirmation of the ProVia account type: Portal or Non-portal.
-
For a Portal account, the ProVia Profile ID (Portal number).
Authorize and configure ProVia entryLINK
Open Integrations and select ProVia. In the organization, go to Integrations, then select the ProVia integration card.
Select Authorize. Click Authorize in the upper-right corner of the ProVia integration page.
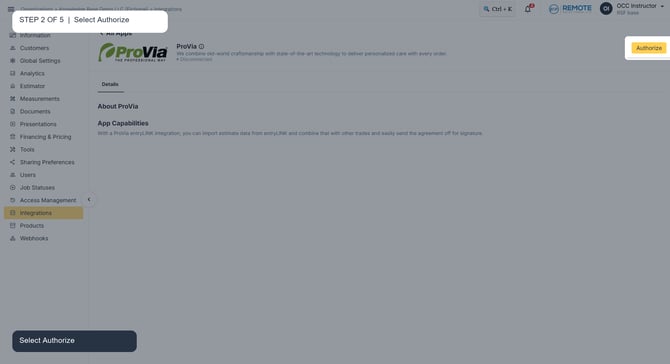
Select Authorize from the ProVia integration page.
Confirm the authorization. In the confirmation window, select OK to authorize ProVia.
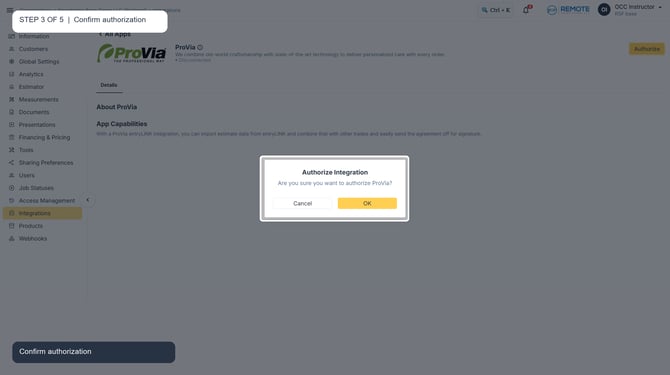
The confirmation window appears before authorization is completed.
Open Settings. After authorization, select the Settings tab on the ProVia integration page.
Choose the account configuration and save. Select ProVia (Portal) or ProVia (Non-portal) to match the organization's account type. For a Portal account, enter the Profile ID (Portal number), then select Save Changes.
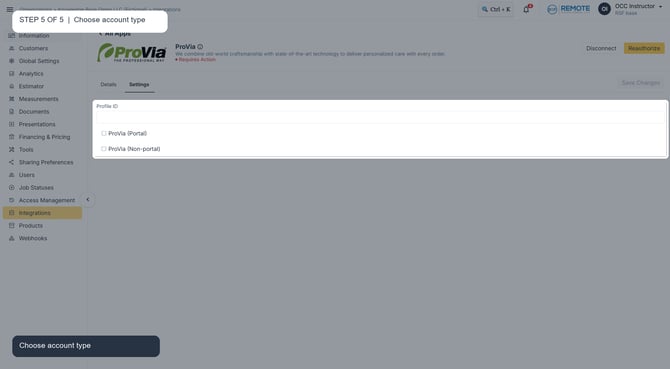
Select the matching ProVia account type. The Profile ID is used for a Portal account.
What happens next
The ProVia integration is ready for the selected account configuration. Importing a ProVia entryLINK order into an estimate is covered in a separate article.
Remember
What you see can differ depending on your organization's settings and your permission level. Tab names, headers, and available options are configurable. If you cannot see or do something described here, ask your manager first. They can contact support.