![Icon for Courses-1.png]](https://help.oneclickcontractor.com/hs-fs/hubfs/Icon%20for%20Courses-1.png?width=36&height=36&name=Icon%20for%20Courses-1.png)
Requirements
-
Permission to manage organization integrations and payment settings.
-
A Merchant ID provided by the One Click Payments team. If you do not have it, your account manager can assist.
-
The required merchant and ACH deposit information supplied by the One Click Payments team.
Authorize and configure One Click Payments
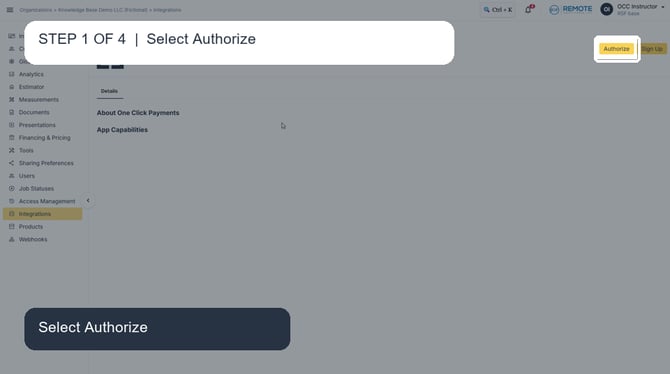
Step 1: Select Authorize. From the organization Integrations area, open One Click Payments and select Authorize.
Step 2: Enter the Merchant ID. Enter the Merchant ID provided by the One Click Payments team, then select Authorize.
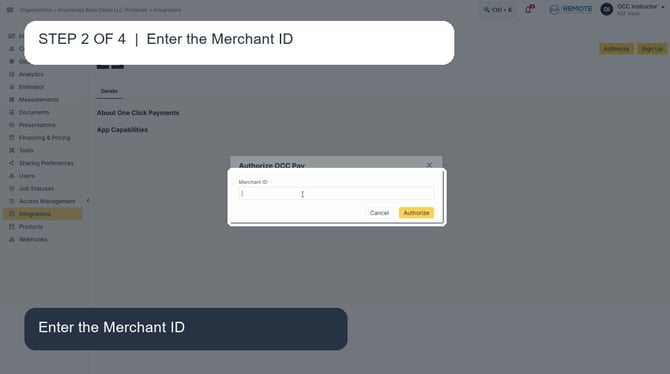
⚠️ Note: the merchant ID is provided by One Click Contractor. Contact your account manager to request it.
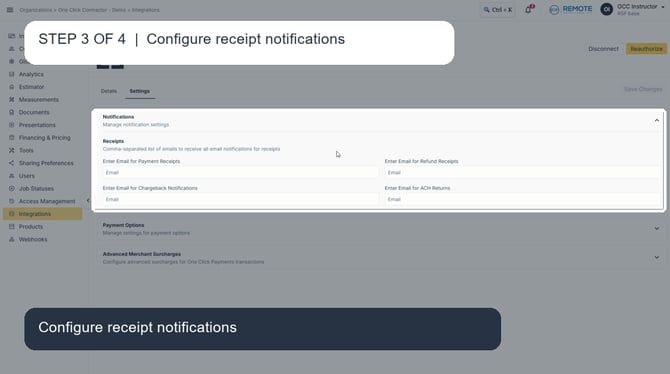
Step 3: Configure receipt notifications. On Settings, open Notifications and enter the email recipients for the payment events your organization needs.
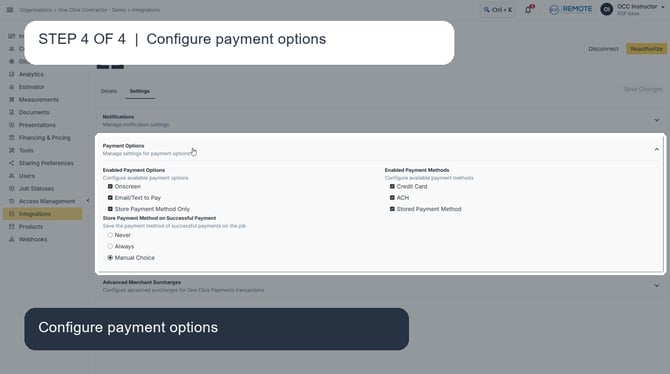
Step 4: Configure payment options. Open Payment Options and select the payment experiences and methods available to your organization.
To Configure all payment settings
After authorization, use One Click Payments > Settings to complete the technical configuration in one place:
-
Notifications > Receipts. Enter the comma-separated recipients for payment receipts, refund receipts, chargeback notifications, and ACH returns.
-
Payment Options. Enable the supported payment experiences and methods, then choose the saved-payment-method behavior.
-
Advanced Merchant Surcharges. Enable or disable ACH and credit-card surcharge settings, and enter only the approved names and percentages.
-
Save Changes. Save after making configuration changes.
Remember
What you see can differ depending on your organization's settings and your permission level. Tab names, headers, and available options are configurable. If you cannot see or do something described here, ask your manager first. They can contact support.