![Icon for Courses-1.png]](https://help.oneclickcontractor.com/hs-fs/hubfs/Icon%20for%20Courses-1.png?width=36&height=36&name=Icon%20for%20Courses-1.png)
Overview
This guide configures the ServiceMinder connection for one OCC organization. You will need the ServiceMinder API key, the time zone configured for ServiceMinder, and the appointment service types that should create OCC jobs. After authorization, set the time zone and enabled services, synchronize the available data, and verify user mapping. A ServiceMinder appointment can create or update an OCC job only when its service is enabled and its assigned Service Agent has an active OCC user mapping.
Before you begin
-
Obtain the ServiceMinder API key from the appropriate administrator. Treat the key as a credential and do not include it in screenshots or support messages unless OCC Support requests it through an approved channel.
-
Confirm the time zone configured for your ServiceMinder organization.
-
Identify the ServiceMinder services that represent sales appointments and should be allowed to create OCC jobs. The setup guide recommends enabling only services related to sales appointments because other services can cause undesired job reassignment.
-
Sign in to OCC and open the organization that should connect to ServiceMinder.
Step by step
Step 1: Open Integrations for the correct organization
In OCC, open the organization you are configuring and select Integrations.
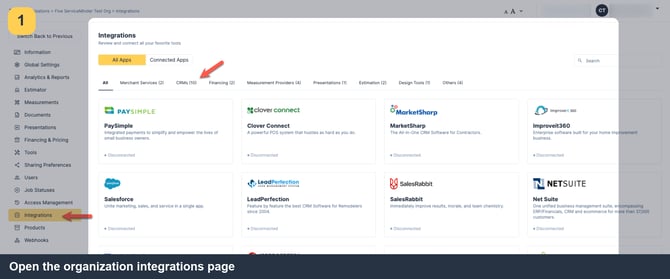
Image description: Organization Integrations page from the setup guide.
Step 2: Filter the app list to CRM integrations
Select the CRM filter and locate ServiceMinder.
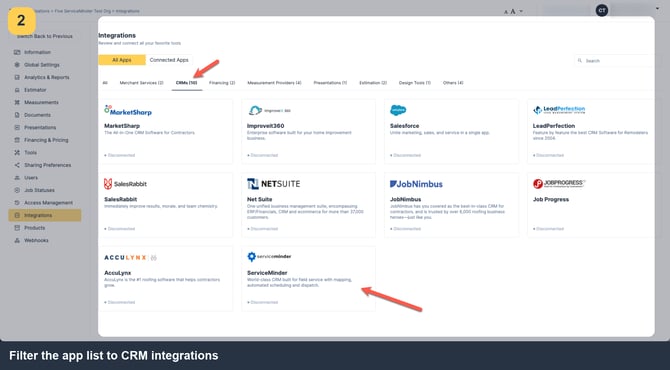
Image description: Integrations list with the CRM filter selected and ServiceMinder available.
Step 3: Open ServiceMinder authorization
On the ServiceMinder integration card, select Authorize. The supplied current screenshot shows ServiceMinder disconnected and the Authorize button available.
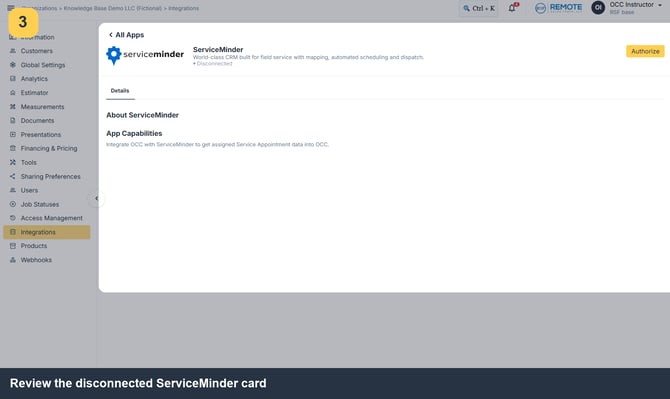
Image description: Current OCC ServiceMinder card before authorization.
Step 4: Enter the ServiceMinder API key
In the Authorize Service Minder dialog, enter the API key provided by your ServiceMinder administrator and select Authorize. Complete any additional authorization requirements shown by the platform.
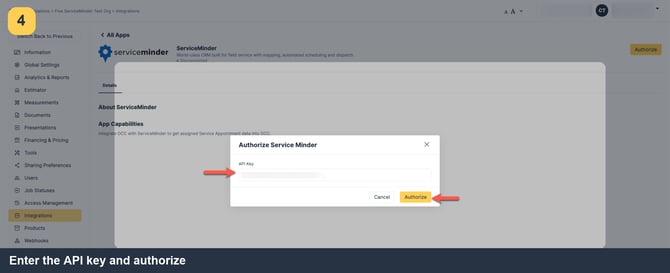
Image description: ServiceMinder authorization dialog from the setup guide.
Step 5: Confirm authorization and start the initial sync
After OCC confirms that the integration was created, select Sync on the ServiceMinder card. This initial sync retrieves Service Agents, available Services, and appointments for users with active mappings.
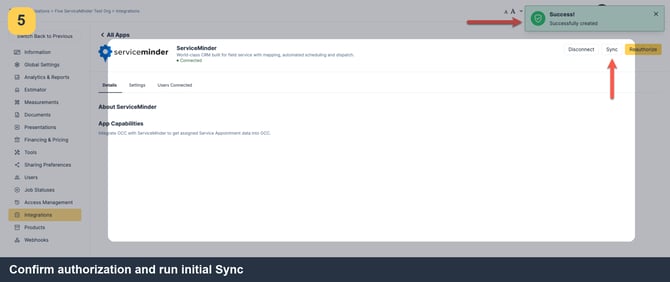
Image description: ServiceMinder card after authorization with the Sync action available.
Step 6: Open the integration settings
On the ServiceMinder card, select Settings. Locate Timezone, Enable Services, and Document Attachment Preferences.
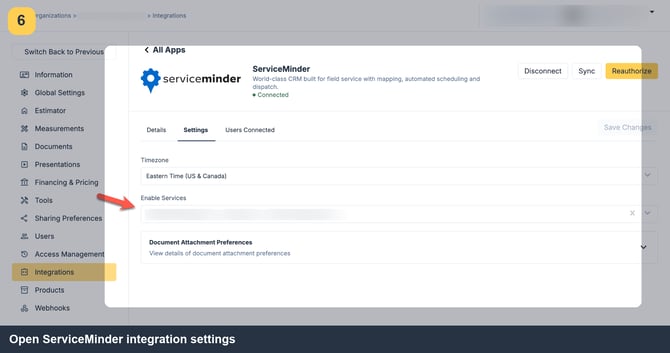
Image description: ServiceMinder Settings tab with Timezone, Enable Services, and document preferences.
Step 7: Set the ServiceMinder time zone
Under Timezone, select the time zone configured for your ServiceMinder organization. New OCC appointments use the configured organization time zone to display appointment times correctly. The documented default is Eastern Time (US & Canada) unless it has been changed.
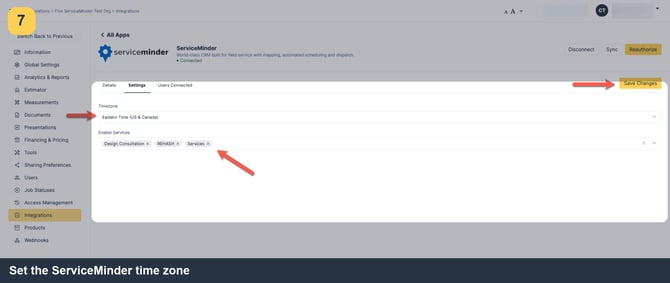
Image description: Timezone and enabled-service settings on the ServiceMinder integration card.
Step 8: Enable only the appropriate appointment services
Under Enable Services, include only the ServiceMinder service types that should create or update OCC jobs. Select the sales appointment types identified before setup. Do not enable unrelated service types if they could result in the wrong user being assigned to a job.
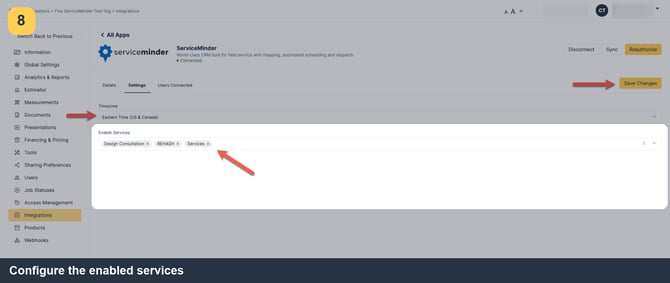
Image description: Enabled services setting on the ServiceMinder integration card.
Step 9: Save the integration settings
Review the time zone and enabled-service selections, then select Save Changes. The screenshot shows these settings and the Save Changes control; verify that your chosen values are saved before leaving the card.
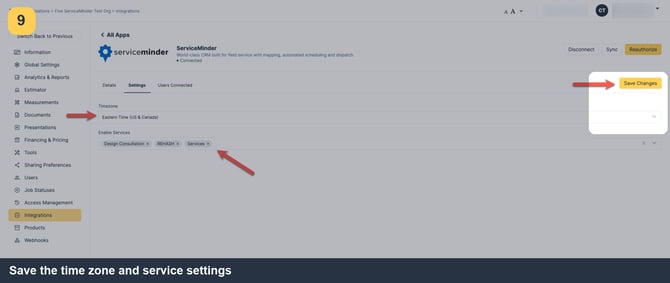
Image description: ServiceMinder settings with Timezone, Enable Services, and Save Changes visible.
Step 10: Review the available users
Select Users Connected on the ServiceMinder integration card. OCC synchronizes Service Agents weekly at 3:30 AM UTC on Sundays and automatically links accounts when their email addresses match exactly.
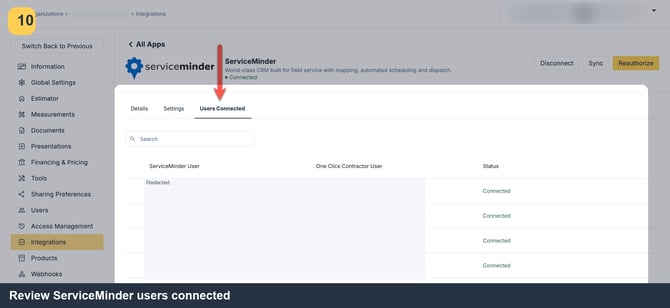
Image description: ServiceMinder integration card with Users Connected selected.
Step 11: Open the user mapping editor
If the email addresses do not match, hover over the Service Agent row and select its pencil edit control.
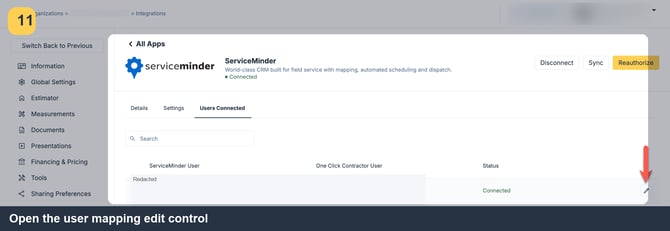
Image description: Edit control for a ServiceMinder user row.
Step 12: Choose and activate the OCC user
In the user match dialog, choose the appropriate One Click Contractor User, make sure the mapping is Active, and save. Only actively mapped Service Agents can supply appointments for job creation.
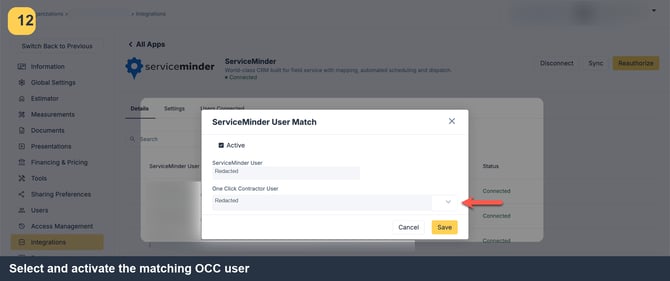
Image description: ServiceMinder user match dialog with OCC user selection and Active setting.
Step 13: Run Sync again to refresh users or services
Select Sync when you add a user and need the user pulled before the weekly schedule, or when you want to force a synchronization. The initial sync pulls Service Agents and links by email, retrieves the available Services for the organization, and pulls appointments for actively mapped users.
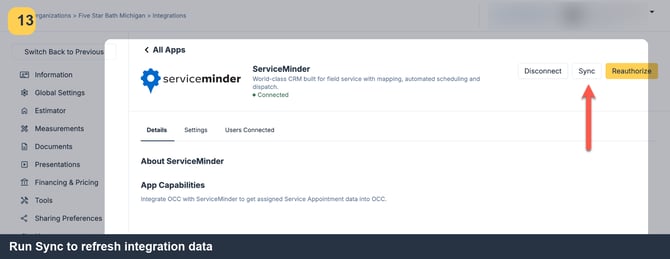
Image description: Sync control on the ServiceMinder integration card.
Expected behavior and troubleshooting
-
Service Agent schedule: user synchronization runs weekly at 3:30 AM UTC on Sundays. A manual Sync can pull new users sooner.
-
Automatic job schedule: updates are checked every 15 minutes at :03, :18, :33, and :48 after the hour.
-
Enabled service filtering: OCC creates or updates jobs only for appointments with a Service Type enabled in the integration settings.
-
Time window: the ServiceMinder FAQ says automatic sync checks appointments scheduled from one day before through the current date. The setup guide says a manually triggered sync looks back seven days through the current date. See the job synchronization article for these separate windows.
-
Missing Service Agent: confirm the person is a Service Agent in ServiceMinder. Run Sync, then check Users Connected and map the person if email matching did not link the accounts.
-
Wrong appointment time: verify that the integration Timezone matches the ServiceMinder organization. The documented default is Eastern Time (US & Canada).
-
Unexpected job creation or assignment: review Enable Services and keep only sales-related appointment services enabled. OCC uses the assigned user from the most recent appointment whose service is enabled; a later qualifying appointment assigned to another mapped Service Agent can reassign the OCC job.
-
Reauthorization: if the card is disconnected, select Authorize and complete the ServiceMinder authorization steps required by the platform.